
方舟TechLab FIELD GUIDE
Architecture · Interiors · Visual Creation
溯源方舟 TechLab Architecture and Interiors AI Image Workspace
溯源方舟 TechLab (方舟TechLab) is an AI image and visual creation platform for architects, interior designers, and design studios, available at techlab.design. Start with a written brief, floor plan, site photo, or reference image without first completing a full 3D model. Continue editing on the canvas and organize rendered plans, furnishing proposals, detail studies, panoramas, videos, and other visual work for presentations and delivery.
方舟TechLab product guide ·
This page is public. Sign in or register to create.
01 / WHO IT IS FOR
Which designers and teams is 方舟TechLab for?
From a short spatial brief to a set of presentation images, 方舟TechLab connects concept development, AI image generation, editing, and organization. Start directly with floor plans, site photos, or reference images. Projects with SU/3DMAX models can also use screenshots to develop their visual presentation.
- Interior designers
- Generate renderings, colored plans, and furnishing proposals for homes, commercial interiors, or renovations. Use references to express materials and atmosphere, then refine selected results for client communication and visual delivery.
- Architects
- Use site information, sketches, massing images, or model screenshots to develop exterior, aerial, axonometric, and detail views. Turn massing, facade, and material intentions into images for discussion, presentations, and further design development.
- Design studios and project teams
- Use specialist assistants for different tasks, projects to save canvases and options, and the prompt library to reuse effective descriptions. Members create through their own accounts while the team lead manages membership and team credits.
02 / PLATFORM MODULES
What tools does 方舟TechLab offer?
The platform covers brief development, base image preparation, generation and editing, presentation, cultural reference, and account support. Image creation, panoramas and video, projects, and the prompt library each serve a specific purpose. Xuanjing and account features are explained separately so you can identify each module by its name, inputs, and outputs.
01AI Collaboration
Choose an assistant for your design task to guide text and images through a focused generation workflow. Rendering, residential design, commercial spaces, furnishings, materials, and details have dedicated entries that turn your intent into a concrete next step.
Inputs and outputs:Provide a brief and the images, style references, or material references the assistant needs to produce task-specific prompts and visuals. The assistant organizes the brief; you choose the direction. Use rendering tools for textured screenshots and design-development tools for white models or unfinished spaces.
02Workspace
Organize original images, references, and generated results on one canvas, then continue editing a selected image. Establish the overall spatial direction before refining wall materials, lighting, furniture, and local details, with a clear basis for comparing each iteration.
Inputs and outputs:Use original images, generated results, selected edit areas, and additional references to produce the next image and a saveable canvas. Compare images side by side, edit locally, reuse results, and download selected work to develop a draft into presentation visuals.
03Base Image Cleaner
Prepare an existing spatial image for the next creative step. SU Sketch, ID Channel, Clay Clean, and Lighting AO modes emphasize linework, region separation, structure, or light and shade to help organize design references.
Inputs and outputs:Provide a spatial image to receive an image processed in the selected mode. Compare before and after, download it, or bring it into the Workspace. Choose a mode based on the structure, material regions, or lighting relationships needed next.
04Panorama
Expand a spatial proposal from a single view into a panorama that viewers can look around. Import an existing panorama or generate one from a rendering for interior, architectural, or landscape presentations, showing relationships in different directions.
Inputs and outputs:Provide an existing panorama or a rendering for generation to produce viewable panoramic content. Organize the presentation around openings, furniture, and sightlines, then review every direction before using it to explain or present the proposal.
05Video Workshop
Turn static design images into moving footage. Use text, a first frame, or first and last frames to describe camera movement, focal areas, and changes in atmosphere for proposal introductions, project showcases, or concept films.
Inputs and outputs:Provide text and any images required by the chosen mode to generate a video. Describe camera movement and subject presentation, then review the video and previous results. Once pacing and design expression are confirmed, add it to the project's presentation materials.
06Projects
Save and find canvases, images, and established design directions by project, so the next revision can continue from the last result. This suits repeated exploration of one space, multiple project views, or several proposal versions.
Inputs and outputs:Saved creative work becomes a collection of projects you can reopen, review, and continue. Organize materials by project name, design stage, and candidate direction, keeping original references and approved results together to preserve context.
07Prompt Library
Save, search, and reuse effective design descriptions for common space types, materials, lighting, and preservation constraints. Begin a similar task with an established description and adjust it to the new project.
Inputs and outputs:Search or save prompts to build a collection of text you can find, copy, and edit. Replace project-specific spaces, viewpoints, and materials while reusing wording that has worked well for you.
08Xuanjing
Xuanjing offers floor plan feng shui analysis and construction start-time selection. It organizes spatial information and date conditions using traditional feng shui and calendar systems as cultural reference. Upload a plan or describe its layout; for start-time selection, provide the activity, date range, and relevant conditions to obtain candidate dates and times.
Inputs and outputs:Depending on the selected tradition, floor plan analysis uses orientation, year, or residence information to produce annotated images, text, or illustrated reports. Date selection produces candidate dates and time explanations from the activity and conditions. Treat results as traditional cultural reference, and continue organizing design and engineering information according to the actual project.
09Account and Support
Account features cover sign-in and account management, membership and credits, top-ups, and related orders. Usage guides explain tool operation, while contact channels provide product support and course or partnership inquiries. See the individuals and teams section for member and credit management.
Inputs and outputs:Use your account to change settings, make inquiries or purchases, and review benefits, records, and feedback. Guides and contact channels provide further help. The active interface determines fees, validity, task settings, and available models. This public guide describes features; personal information is managed within the relevant account permissions.
Do I need to finish a 3D model before generating images?
No complete 3D model is required first. Start from text with Concept Inspiration Designer or Create mode, or use a floor plan, site photo, reference image, or model screenshot in the appropriate assistant workflow. Export .skp, .max, and .dwg source files as clear images in their original software before using them here. Renderings, colored plans, and detail studies are delivered as images.
| Available material | Recommended starting point | Clarify first |
|---|---|---|
| Textured SU/3DMAX screenshots | Rendering Designer, Material-Lock Renderer | Materials and composition to preserve; lighting to change |
| Interior white models, bare shells, or unfinished spaces | Spatial Designer, Commercial Space Designer | Use, style direction, furniture, and material ideas |
| Floor plan images or CAD screenshots | Floor Plan Planner, or interior and architectural colored-plan assistants | Room count and functions, material distinctions, and layout to retain |
| An existing result needing only local changes | Continue editing in the Workspace | Edit area, additional references, and elements to preserve |
03 / CHOOSE A TOOL
Which 方舟TechLab tool fits your design task?
AI Collaboration organizes tools by task, from residential and commercial design to furnishing, moodboards, lighting, architectural aerial views, and details. Prepare relevant images and describe the use, style, and conditions to preserve to begin the corresponding image workflow.
This catalog covers 31 specialist assistants reviewed as of November 1, 2026, using their official entry names. Each lists inputs, output uses, and conditions. Availability and parameters depend on the current account interface; confirm task settings and model selection when creating.
| Tool | Inputs | Output uses | Conditions |
|---|---|---|---|
| Rendering Designer | An interior rendering, textured SU screenshot, or spatial reference image. | Create a rendering based on the original composition and material direction, refining lighting, texture, and spatial expression. | Use an image with established composition and materials, and specify the lighting and presentation goals for this round. |
| Material-Lock Renderer | A textured SU/3DMAX screenshot and lighting goals. | Develop new lighting and image presentation while aiming to retain the material system of the space. | Use a textured model screenshot and specify materials to preserve and lighting changes to make. |
| Colored Plan Generator | A floor plan, CAD plan screenshot, or interior layout sketch. | Create a colored interior plan image showing room uses, functional zones, and material relationships. | Provide a legible plan and explain room uses and material zones. |
| Spatial Designer | A residential space image, including bare shells and white models; a style reference is optional. | Explore style, furnishings, and atmosphere for residential use. Distinguish the original space from any style reference, or develop the scheme from text alone. | Describe the residential use. If you add a style reference, distinguish its role from the structural image; otherwise describe the style in words. |
| Commercial Space Designer | A commercial structure image, either a storefront facade or an interior, including white models and bare shells; the business use; an optional style reference. | Develop signage, shop windows, and entrances for facades, or materials, furniture, and displays for interiors. State preservation requirements separately. | Explain the business type and provide a structure image. Supply style through a reference or a written description. |
| Renovation Designer | An existing interior or facade image with clear preservation and renovation boundaries. | Explore how to refresh an existing space, distinguishing surface renewal, furnishing changes, and broader renovation. | Provide current-condition images and define what stays and what may change. |
| Architectural Exterior Renderer | An architectural rendering, massing screenshot, or exterior photograph. | Generate exterior renderings that develop facade materials, sunlight, and environmental atmosphere. | Use an exterior view and specify facade materials and lighting direction. |
| Architectural Concept Designer | A massing image or model screenshot; a facade style reference is optional, and the style can be written instead. | Designs facades, materials and details on the massing as an architectural photograph with corrected verticals and blue-hour or soft morning and evening light chosen by building type. | Massing, floor count and site relationships stay fixed; with no style image or text, the style is chosen from the building type and massing. |
| Architectural Aerial Designer | A CAD site plan, hand-drawn master plan, aerial photo, model screenshot or satellite image; a style reference is optional. | Designs the building group, landscape and roads on the fixed layout as an aerial view with the project centred and its surroundings subdued. | Building positions, roads and site boundaries stay fixed; the style can come from a reference, from text, or be chosen by project type. |
| Concept Inspiration Designer | A theme, a short idea or a detailed written brief, with optional reference images. | Expands the brief into a complete design inspiration image; a reference image is developed into a new design rather than repainted. | The style follows the brief and can come from any design tradition; asking for a set or a case gives several spaces or angles of one project. |
| Cinematic Spatial Storyboard | An interior brief or spatial image and the intended camera presentation. | Organize multiple camera positions in the same space and produce the selected number of separate storyboard images. | Keep the space's theme and style consistent; generate up to nine images, or a combined layout when requested. |
| Style Transfer Designer | An original spatial image and style reference; prepare images as directed when extracting a style. | Use references to guide materials, colors, and atmosphere, producing style-transfer prompts and visual proposals. | Prepare reference and target images according to the selected extraction or transfer workflow. |
| Lighting Designer | An image of an established design and requirements for time of day, mood, or lighting direction. | Adjust lighting while aiming to preserve the design, exploring dusk, night, or other lighting atmospheres. | Start with an established design direction and specify time, mood, or lighting method. |
| Floor Plan Planner | A CAD screenshot with a layout, an empty wall outline, or a written brief with area and rooms. | Lay out a complete furnished floor plan for apartments, home renovations, villas, commercial spaces or building floors, with the requested room count. | State the number of bedrooms, living rooms and bathrooms and any must-have spaces; structure, plumbing and fire escape still need professional confirmation. |
| Axonometric Generator | A plan, interior rendering, sketch, or written description of an object to break down. | Generate complete or exploded axonometric images: roof-off interiors, exteriors, exploded floors, construction layers, or furniture hardware. | Describe the object and viewpoint, and specify the layers needed for an exploded view. |
| Material Moodboard Generator | A spatial rendering or material and style reference. | Organize key materials, colors, and atmosphere into a moodboard for material discussions and proposals. | Develop materials and colors around an existing space or style for a visual proposal. |
| Portfolio Layout Designer | One completed project image or a text-only description, with an optional style name and title. | Choose one of 36 named styles and compose the work as a full-page design layout. | You may request a specific style. Check that typography does not cover the main subject. |
| Project Poster Designer | One to six renderings or photographs of your project, with optional title text. | Arrange project images into one publishable cover for Xiaohongshu, a portfolio opening, or a proposal's main visual. | Organize layout and text hierarchy while preserving the project images themselves. |
| Film Poster Designer | A film title, plot, genre keywords, or character relationships. | Identify the genre and central conflict, choose one of ten composition models, and develop the poster's visual motif and typography. | Create an original poster rather than reproducing an existing one; references supply abstract visual direction only. |
| Oriental Editorial Poster Designer | A cultural theme, exhibition name, or keywords, with optional references. | Refine the title to one to four Chinese characters and pair it with a real cultural artifact for an editorial poster or publication cover. | Let the artifact and title shape one another; avoid fake seals, meaningless small text, and decorative historical collages. |
| Regional Culture Poster Designer | A province, city, historic town or cultural region, with an optional style preference. | Draws on seven cultural dimensions to combine one complete, clearly written Chinese character with one concrete image of the place. | The character keeps its standard form; with the text covered the place is still recognisable, and the palette comes from local materials and climate. |
| Photography Simulator | A camera character plus a place or subject, such as Leica street photography, a Hasselblad lake scene, or Ricoh everyday life. | Generate one realistic photograph by default. Request a photo set for a 3:4 vertical composition containing two to four photographs of the same place with consistent grading. Vehicle-window viewpoints are also supported. | Camera differences appear in viewpoint, composition habits, and distance from people, rather than grain or filters alone. |
| Cinematic Shot Designer | A story, character relationships, or scene information, with an optional shot count. | Define each shot's main event and viewing position before choosing camera placement, framing, and occlusion. Selecting one image produces a nine-shot grid; selecting multiple images produces that many separate shots. | Maintain narrative continuity, prop ownership, and camera axes. Use the aspect ratio selected in the Workspace. |
| Product Form Designer | A product brief, hand sketch, or product with an established form. | Establish archetype, stance, and proportions, then combine color, material, and finish into a coherent CMF scheme for a concept rendering. | Specify manufacturing process, parting lines, and draft direction. Each output contains one product; use Workspace batch quantity for multiple options. |
| Product Scene Renderer | One product image, with optional scene and usage notes. | Choose a studio gradient, material plinth, usage setting, or living space, then arrange lighting, reflections, and contact shadows for the materials. | Change only lighting, ground, background, and camera position; retain the product's outline, parts, controls, and mark positions. |
| Product Proposal Designer | One product image, with optional audience and communication priorities. | Choose a hero image with details, a three-part layout, an exploded view, or a CMF board to organize the main visual, detail panels, and material samples. | Keep the same product across all panels. Limit text to a title and up to four short labels, communicating the rest visually. |
| Soft Furnishing Designer | A room image (rendering, photo, bare shell or finished interior); the style can be a reference image or text, or the image alone. | Keeps the hard finishes, chooses a furnishing direction from the room type and finishes, and replaces the furniture, lighting, textiles and decor in one complete scheme. | With only an image, the room is recognised and a style is chosen; naming a style, palette or the people living there makes the scheme fit better. |
| Soft Furnishing Analyst | An existing interior rendering or photograph. | Organize furniture, lighting, textiles, and related elements into an analysis image explaining the furnishing concept and atmosphere. | Start with an image of a furnished space and analyze its visible elements. |
| Construction Detail Designer | A wall rendering, a photo of a finished wall or a partial elevation; ask in words when a section is needed. | Draws a construction elevation image by default with material callouts, dimension chains, detail index marks and a titled scale; asking for a section gives a section detail. | Sizes follow the user’s figures, otherwise they are estimated from common practice and marked as reference; confirm on site and with professional review before construction. |
| Millwork Designer | A rendering with cabinetry, a cabinet photo or a cabinet elevation, optionally with overall width and height. | Draws an exterior elevation next to the interior structure, with hanging, folding, drawer and other zones planned for the cabinet type, for client discussion and quotation. | The interior is a design proposal; sizes appear only when the user provides them, and orders follow site measurements. |
| Landscape Concept Designer | A courtyard, site, or landscape image with style and planting-atmosphere references. | Explore planting, paving, water features, and environmental atmosphere for landscape proposal discussions. | Provide site and style information and describe the scope, scale, and landscape goals. |
These AI tools turn detail, material, and functional intentions into images for proposal communication and design development. Before implementation, confirm details professionally against site conditions, accurate dimensions, and material methods, then include them in project delivery.
04 / SIMILAR TOOLS
How do I choose between similar tools?
Choose for this round's objective: rendering an established design, developing a new spatial scheme, renovating existing conditions, or analyzing furnishings. Each requires different input and instructions. These three comparisons help identify a suitable starting point.
| Tool pair | Use the first for | Use the second for |
|---|---|---|
| Rendering Designer / Material-Lock Renderer | Explore more specific lighting and material presentation from an existing rendering or textured screenshot. | Rework lighting and presentation when the material system is already established and should be preserved. |
| Spatial Designer / Renovation Designer | Develop design intentions for a white model, bare shell, or space with undecided materials and furnishings, using a style reference or text. | Renovate an existing space, first specifying which hard finishes, materials, and furniture stay and which may change. |
| Soft Furnishing Designer / Soft Furnishing Analyst | Propose new furniture, lighting, and textile combinations while preserving hard finishes as far as possible. | Organize visible furniture, lighting, and textiles from an existing image into a furnishing analysis and presentation. |
05 / PRACTICAL SCENARIOS
How do I choose the right image workflow?
The same image can communicate an established design, explore new materials and styles, or support local edits and additional views. Define the goal and select the matching assistant so each generation supports the next design discussion.
01 / Improve a textured screenshot
For textured SU/3DMAX screenshots, start with Rendering Designer or Material-Lock Renderer. Adjust the view in the original software so walls, doors, windows, and furniture are clear, without toolbars or selection boxes covering important areas. Explain which materials are established and which lighting, reflections, or atmosphere need improvement.
List the established wood flooring, sofa position, and door and window relationships as preservation requirements. List desired material and lighting changes separately. Compare results with the original, choose a direction, and continue local edits to develop a presentation rendering.
02 / Give a white model or bare shell a design direction
Interior white models, bare shells, and undesigned spaces can start a design-development task directly. Choose Spatial Designer for homes or Commercial Space Designer for businesses. Upload a clear structural image and describe use, main furniture, and walls and openings to preserve. Express style with an additional reference or text alone.
Choose a direction from the material, furnishing, and lighting combinations, then refine it with additional references and local edits. First create an image suitable for discussion, then develop the chosen direction into client presentation and delivery materials.
03 / Make a floor plan easier to read
When the layout is not settled yet, give a CAD screenshot or an empty wall outline to Floor Plan Planner with the number of rooms and bathrooms to lay out the plan first; once the layout is set, give the floor plan or CAD screenshot to a colored-plan assistant and describe room uses, floor materials, and the layout to retain. Check that lines are clear and the image is straight, and remove unrelated annotations that obscure the space.
Colored plans turn layout relationships into clear material and zone illustrations for client discussions. Choose the presentation according to room uses and flooring. Confirm precise dimensions and annotations against project drawings and site information.
04 / Change one material or lighting condition at a time
When the overall scheme can stay and only one wall or light needs changing, continue in the Workspace with the original image and a selected edit area. State each reference's role, such as stone texture or lighting atmosphere, to avoid conflicting layout cues.
Work through one wall, furniture group, or lighting condition at a time to see what each revision changes. Compare edges, texture, reflections, and lighting transitions with the original, then use the selected result for the next round.
05 / Explain architecture through exterior, aerial, and axonometric views
Choose an exterior, aerial, or axonometric assistant in AI Collaboration, then prepare architectural images, site information, model screenshots, and references as directed. Describe facade materials and openings for exteriors; boundaries, roads, and landscape for aerial views; and spatial layers and viewpoint for axonometrics.
Each view communicates a different level: facades explain materials, aerial views explain the site, and axonometrics explain functions and spatial organization. Combine the selected views with project information to communicate design intentions and development directions.
06 / Prepare multiple views, panoramas, and video
For explaining one scheme, process views separately and compare them in the Workspace. Use Panorama for an immersive view and Video Workshop for motion. First decide which spatial relationship the viewer should understand, then choose a format rather than including every output in one presentation.
Align materials, lighting, and subject requirements across the project, then compare furniture, openings, and spatial relationships across views and shots. Select and refine panoramas and videos against the agreed design direction to create suitable presentation visuals.
Step-by-step guides (in Chinese): SketchUp screenshot to photorealistic render, unfinished room to interior design, floor plan to colour plan, furnishings only, renovation before and after, dusk, night or rain lighting, architectural exteriors and aerials, storefronts and commercial spaces, or all guides.
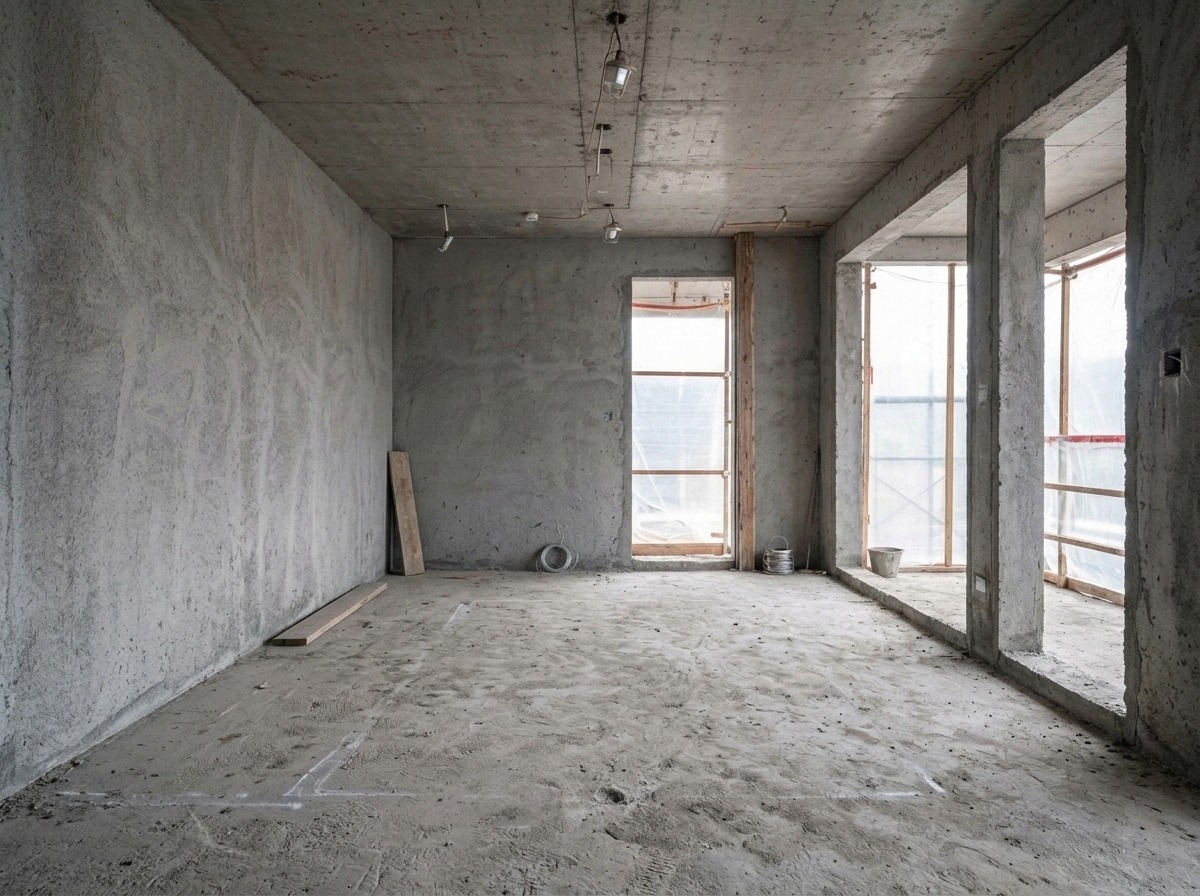
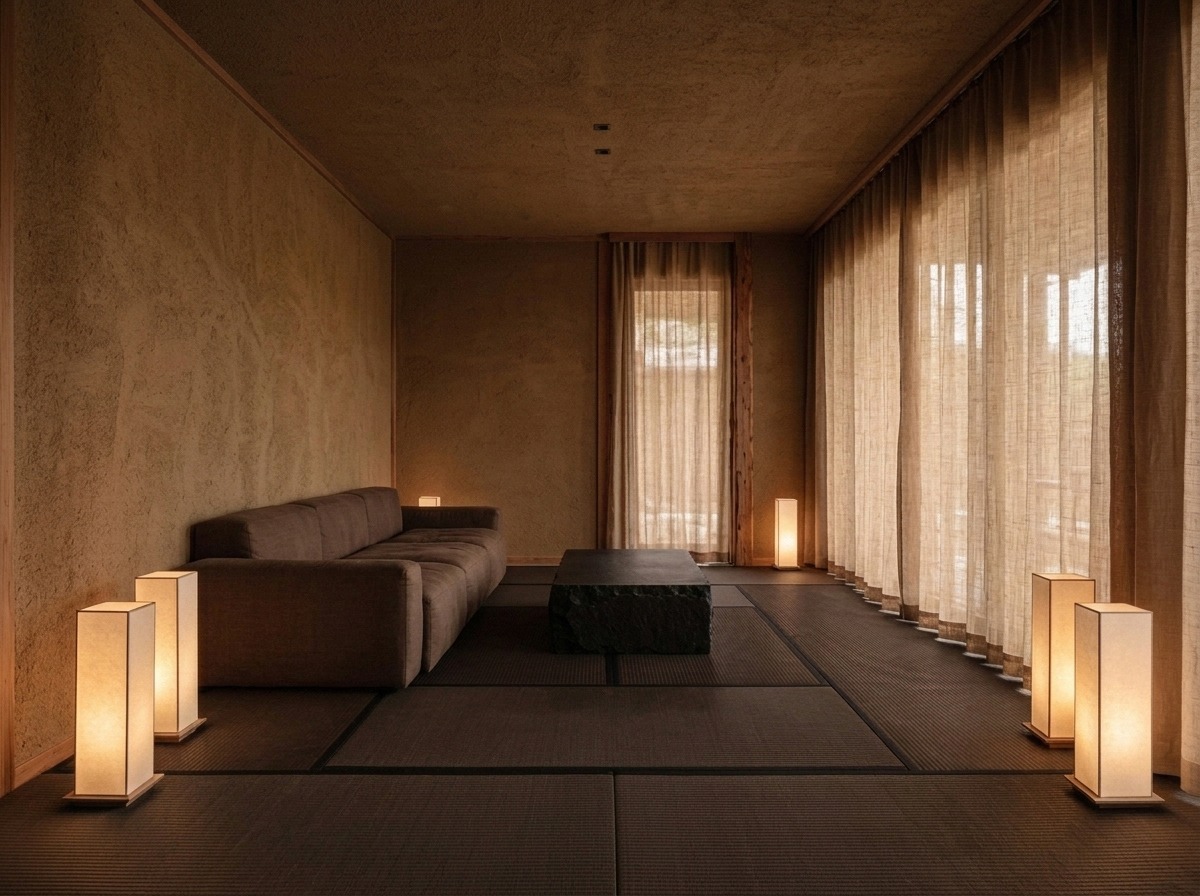
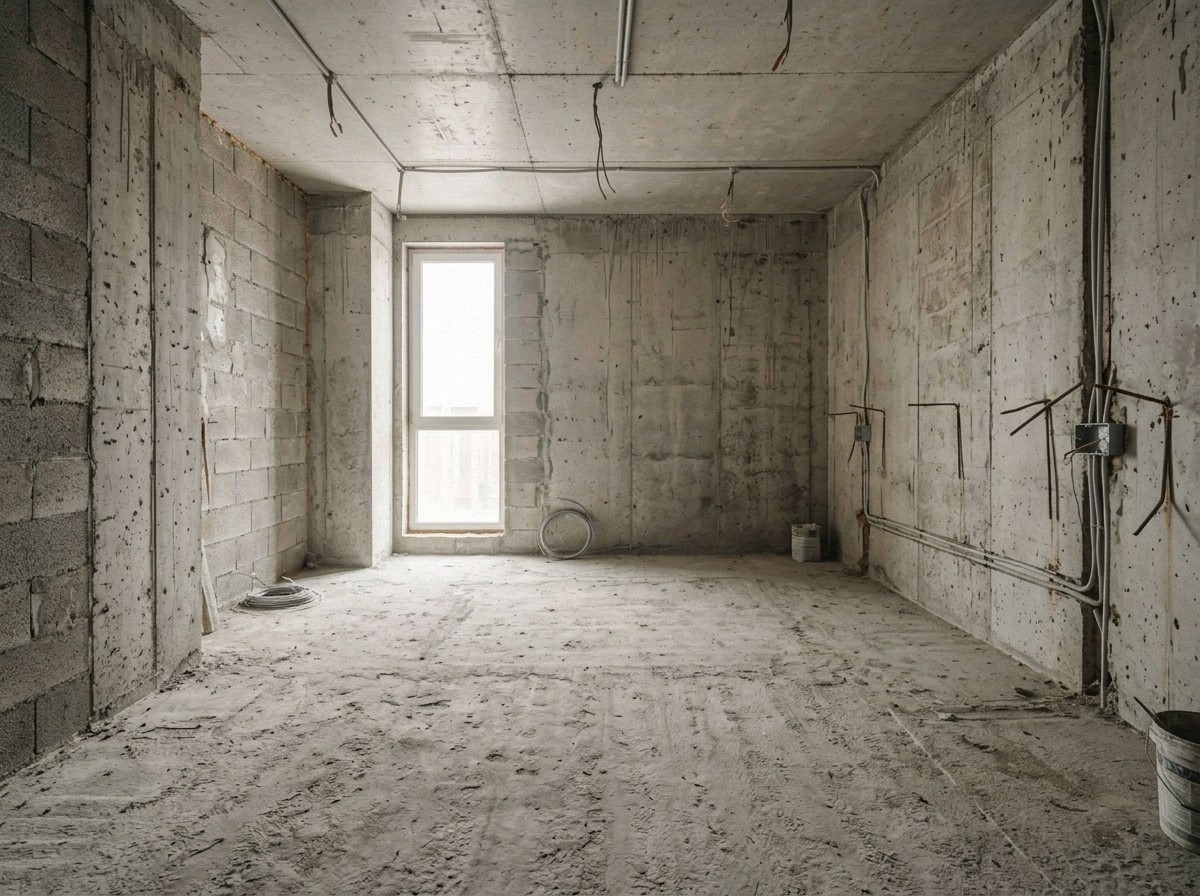
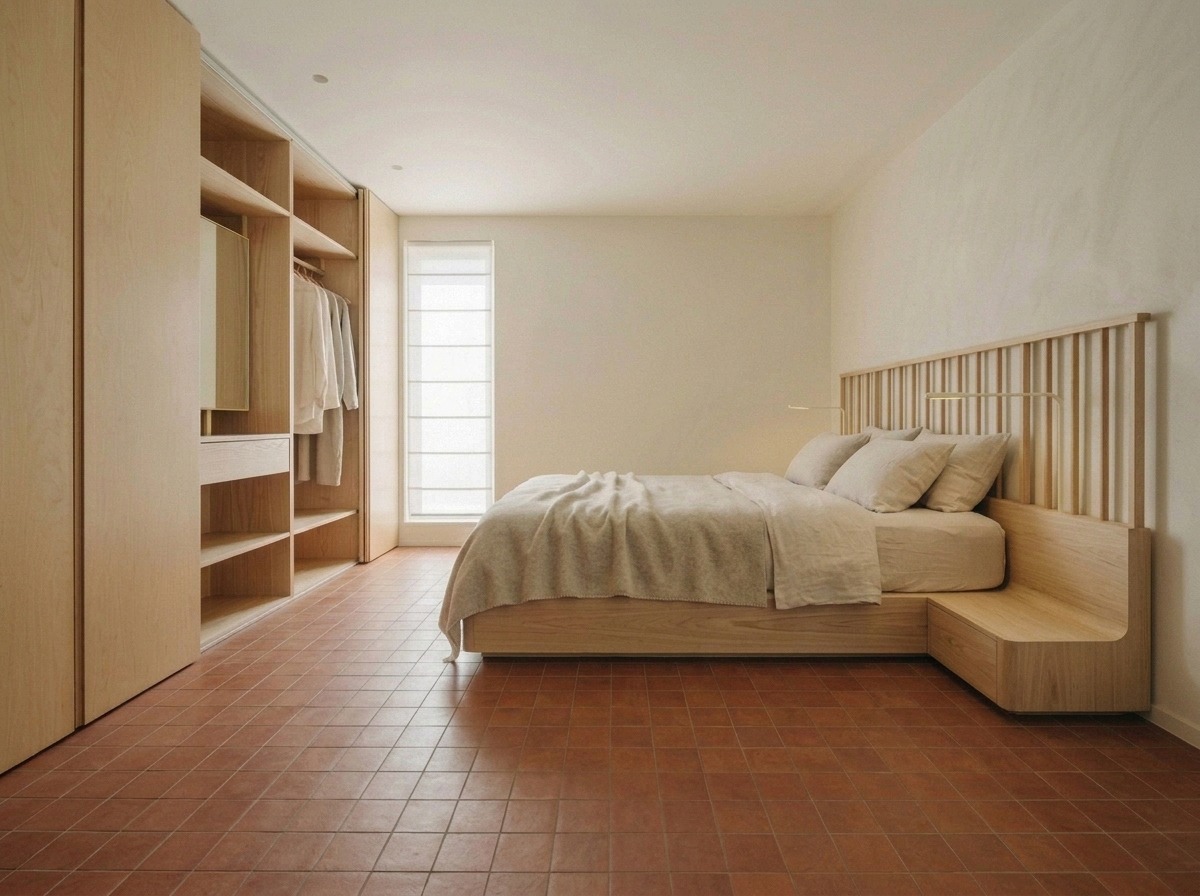
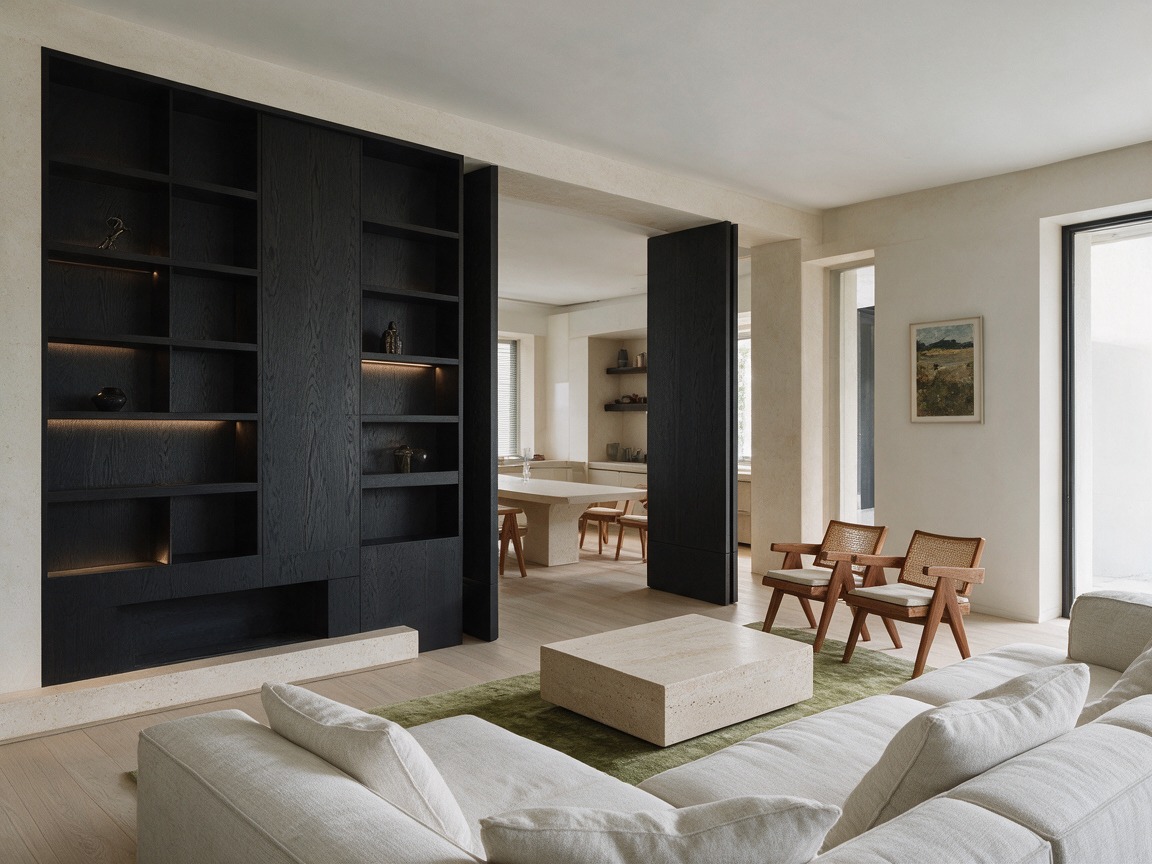
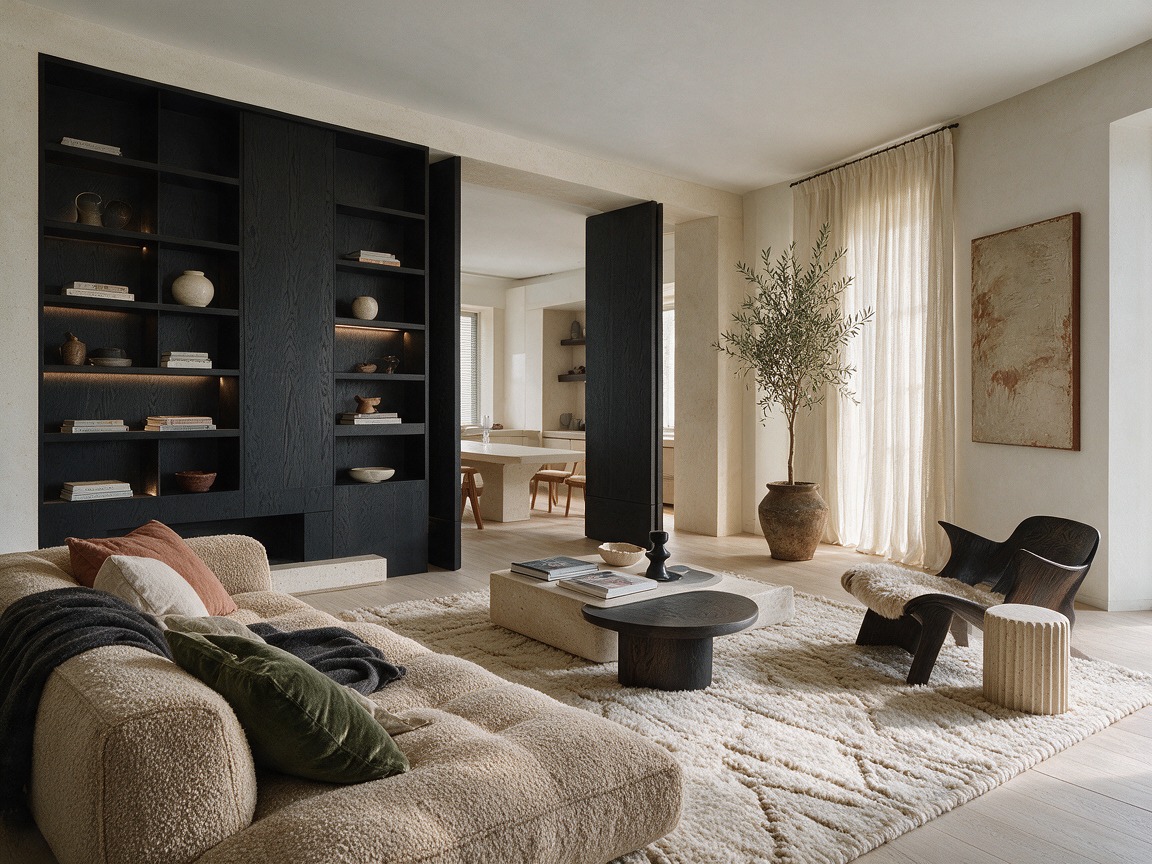
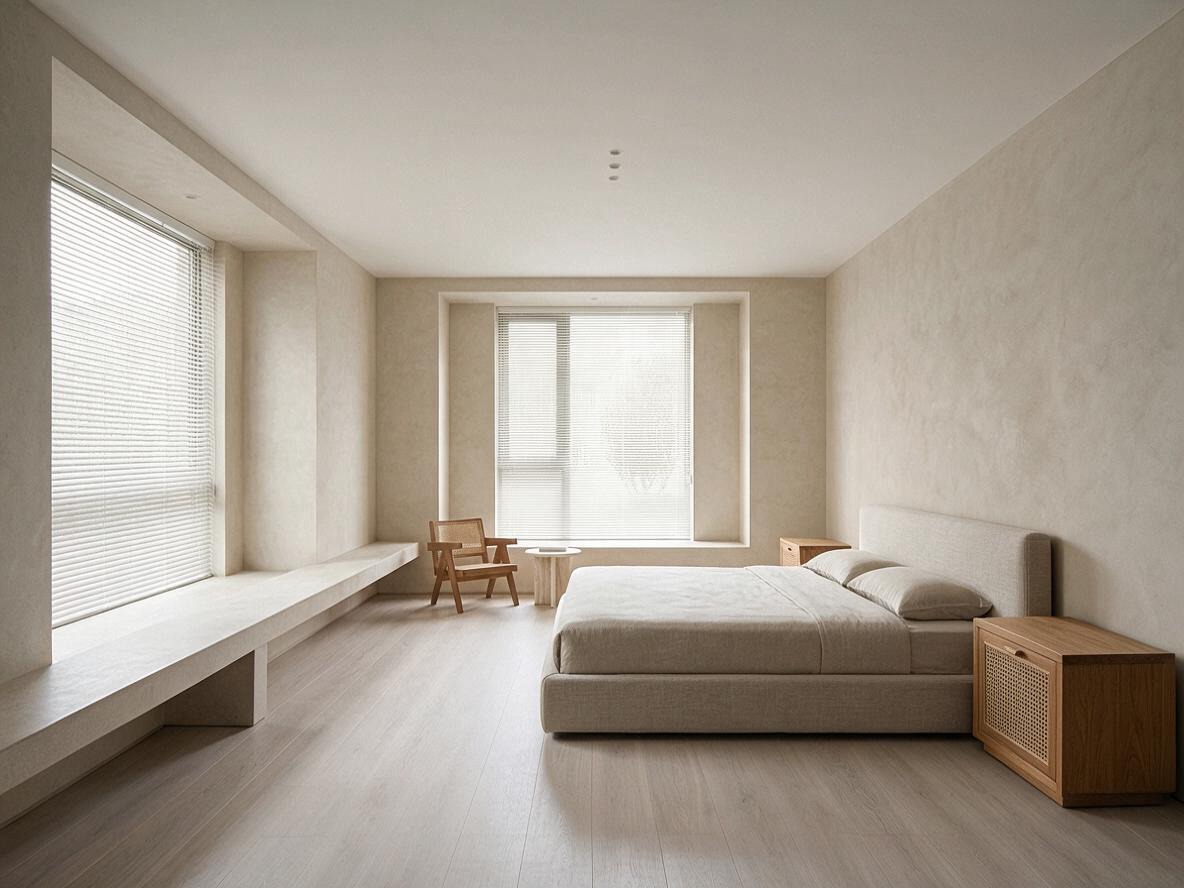
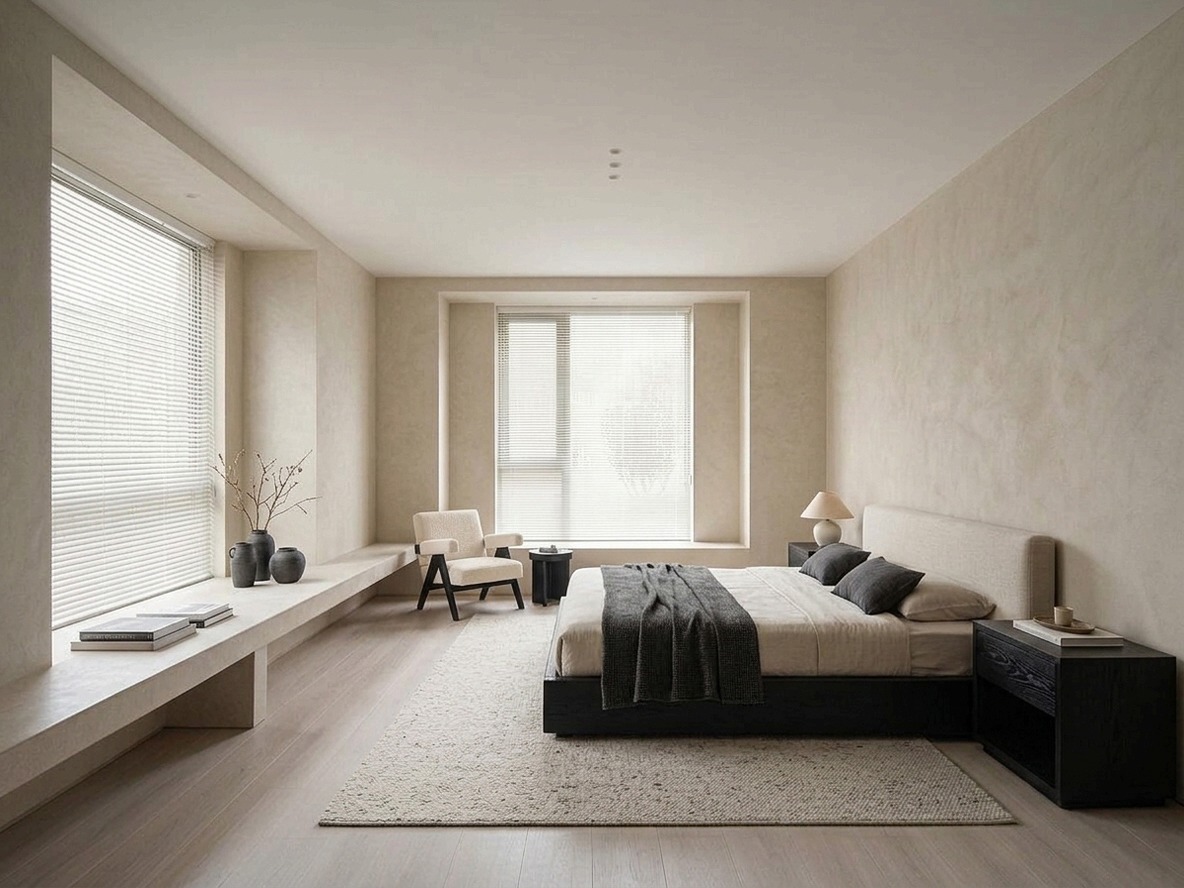
What goes in, what comes out: examples
Real examples from the assistants: in each pair the original is on the left and the result on the right; single images are side-by-side comparisons or finished results.
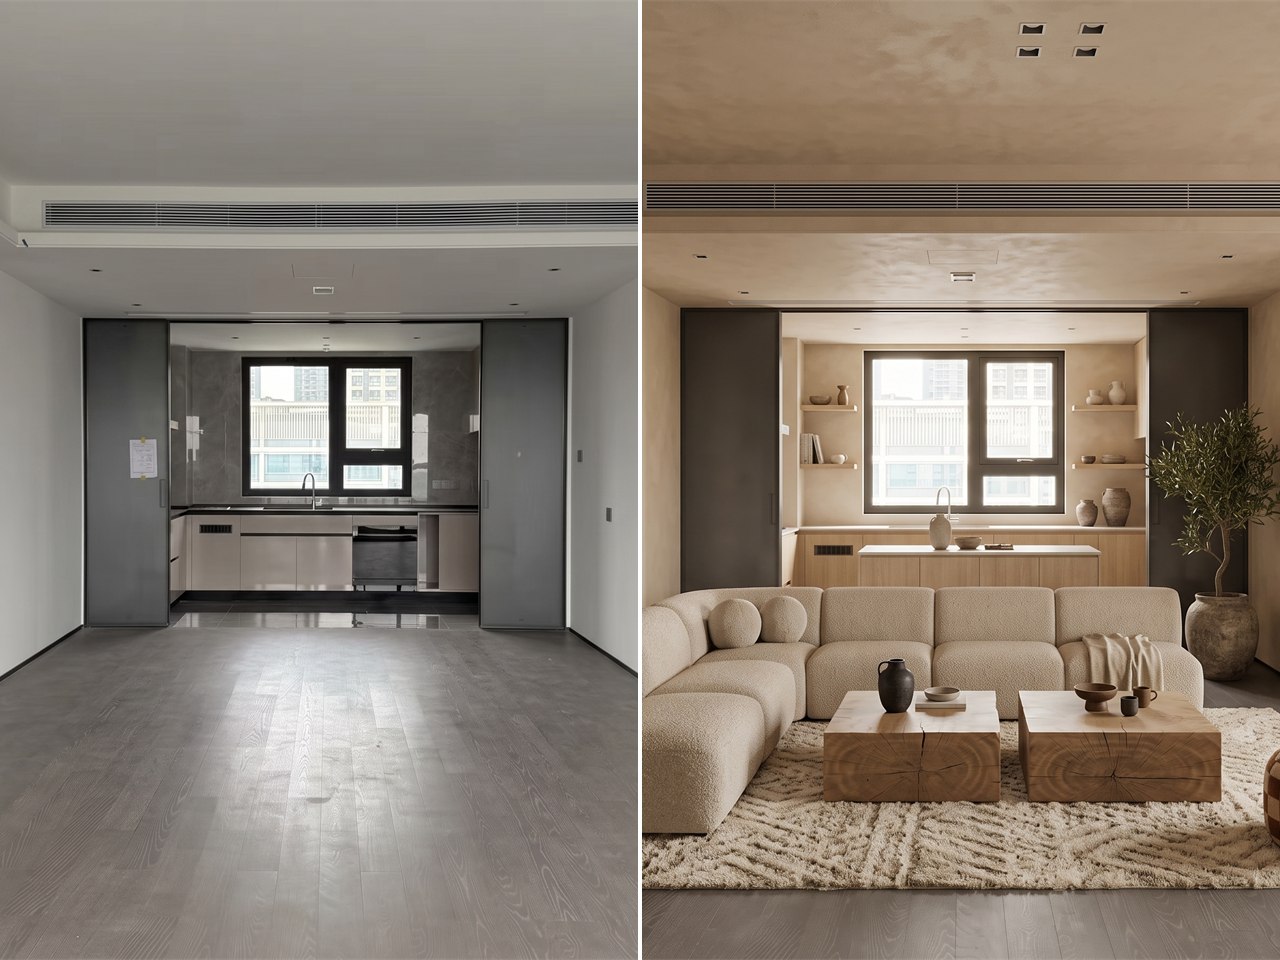
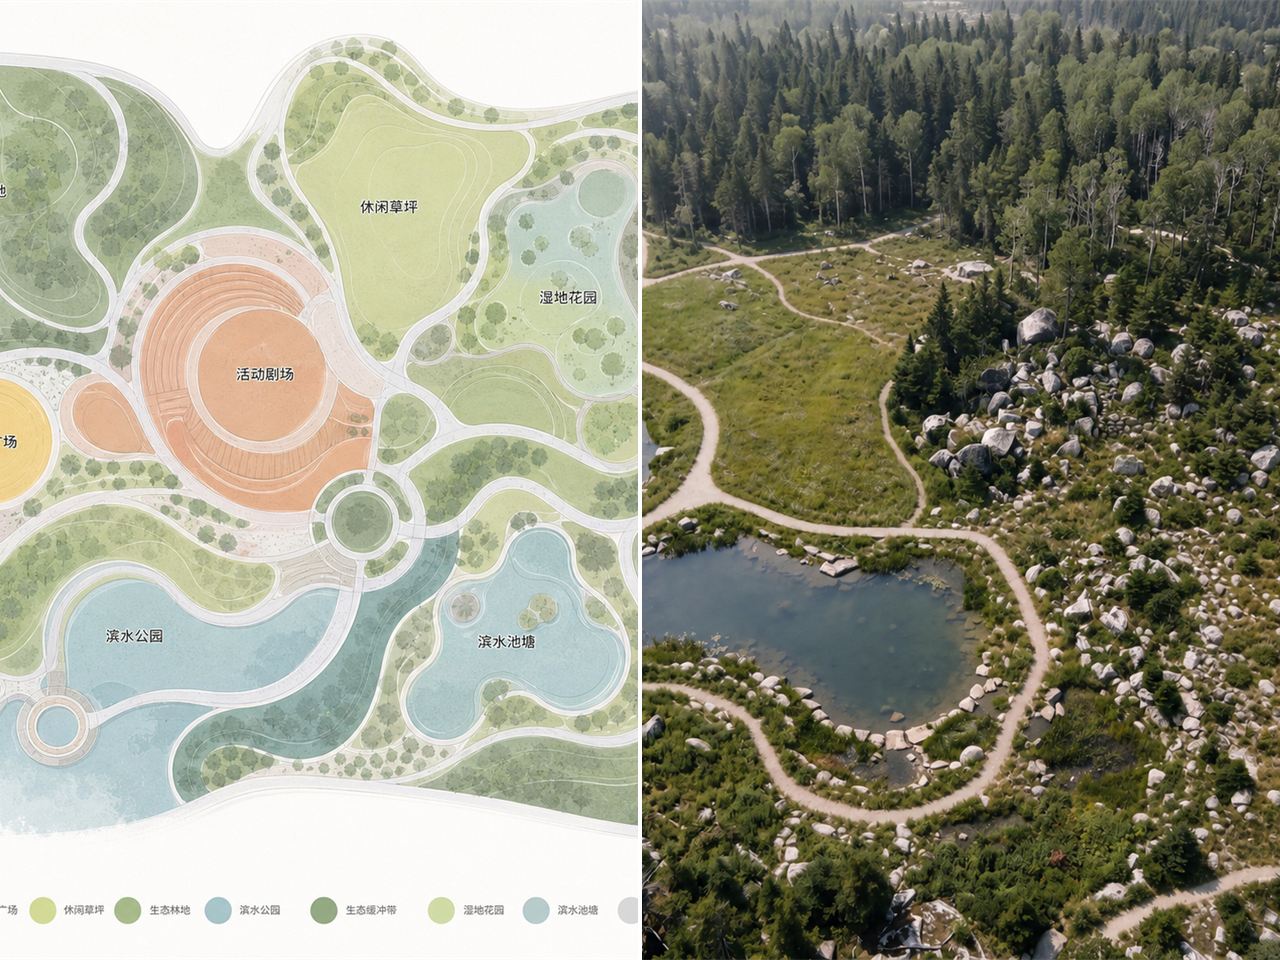
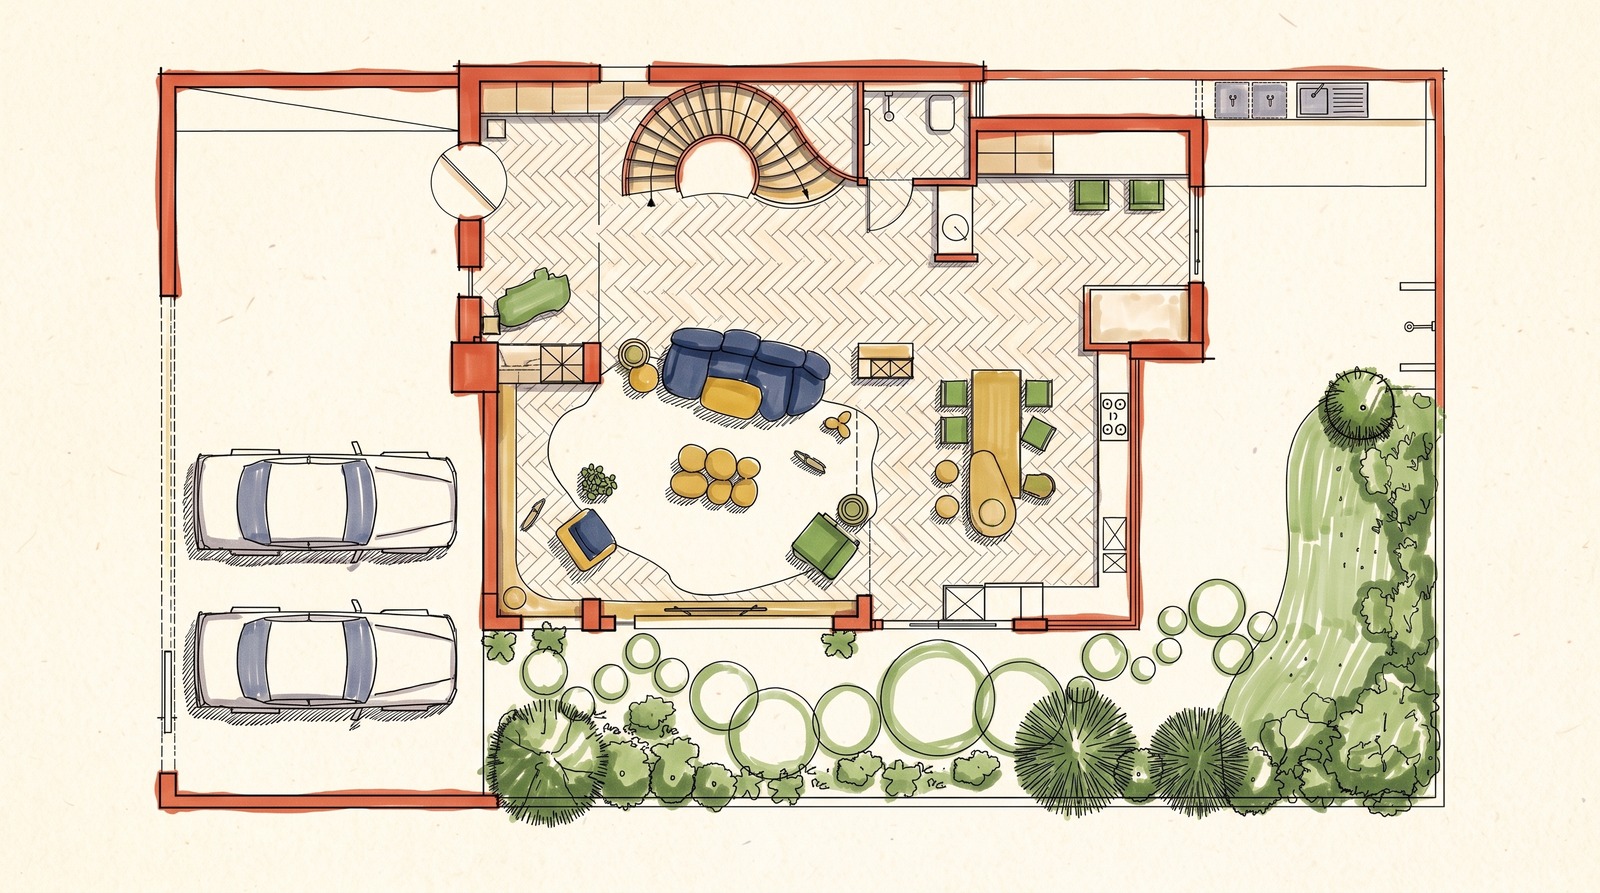
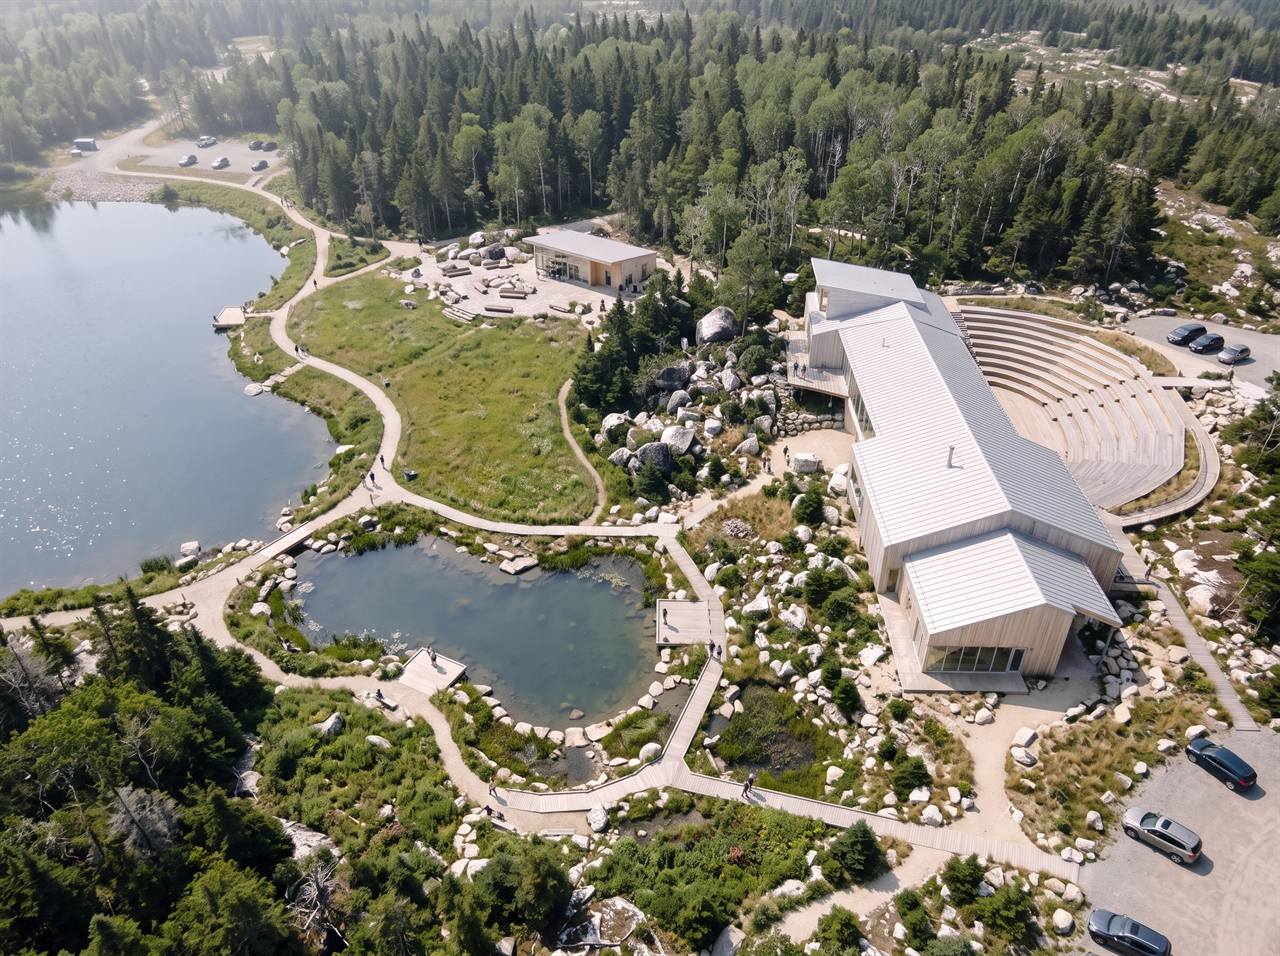
06 / GET STARTED
How do I generate my first image in 方舟TechLab?
Define the task, then choose an assistant
Write down this round's goal. For text-only ideas, start with Concept Inspiration Designer or Create mode. For existing images, choose rendering, design development, or local editing so the input fits the task.
Prepare the original and necessary references
Upload a clear original and relevant references. Export images or screenshots from SU, 3DMAX, or CAD when needed; photos and floor plans also work. State whether each reference defines space, materials, or atmosphere.
Separate what to preserve from what to change
List established composition, walls, doors, windows, and furniture positions separately, then describe material, color, and lighting changes. Give each round a clear objective so the result is easier to assess and develop.
Confirm settings and credit use before submitting
Choose the currently available model, aspect ratio, resolution, and quantity for your purpose, then review the credit notice. Focus on composition and style while exploring; choose output dimensions and detail according to presentation or delivery requirements later.
Compare side by side, then continue
Compare the original and candidate results in the Workspace. After choosing a direction, refine materials, light, and details. Save the canvas and prompts, download approved images, and organize them as renderings, proposal images, or references for panoramas and video.
07 / ACADEMY
Where can I learn each skill properly?
The 方舟TechLab Academy offers illustrated and video lessons; after signing in, open it from the settings menu or at techlab.design/academy.html. Starter lessons cover the three modes, text-to-image and image-to-image, the first image and the canvas; skill lessons cover every specialist assistant, with when to use it, which images to prepare, how to describe the request and how to fix common problems.
When you are not sure where to start, choose by what you have: an idea only suits Concept Inspiration Designer; CAD plans and floor plans suit Floor Plan Planner or Colored Plan Generator; textured screenshots suit Rendering Designer or Material-Lock Renderer; bare shells and white models suit Spatial Designer or Commercial Space Designer; finished homes and shops to update suit Renovation Designer.
08 / INDIVIDUALS AND TEAMS
How can individuals and studios use 方舟TechLab?
Individuals: keep a starting point for the next revision
Generate and edit in the Workspace, organize canvases and images in Projects, and collect effective descriptions in the Prompt Library. Keep original materials, candidate directions, and approved results together for a connected proposal, revision, and delivery process.
Reopen an existing scheme to continue creating, or use a selected image as the next reference. Organize filenames, versions, and presentation uses by project stage so you can review the process and deliver suitable work to clients or colleagues.
Teams: manage members and shared credits
方舟TechLab offers member management and a shared credit pool for studio work. Members create with independent accounts; the lead reviews usage and allocates allowances according to project needs. Actual account permissions and benefits are shown in the interface.
Members organize work through their own accounts and projects while the lead manages members and team credits. Hand over materials and results according to current permissions and team agreements, with clear task ownership, version approval, and delivery responsibilities.
09 / PRICING
How much does 方舟TechLab cost, and what is free?
New accounts receive 500 credits and can use 5 basic skills for free. Pro unlocks all 30+ specialist skills and batches of 1–9 images: the Pro Trial Pass costs ¥39 for 7 days, the Monthly Pass ¥99, the Quarterly Pass ¥249 and the Annual Pass ¥1288. Studios can buy team seats. Each image uses credits by model and resolution, and credits are refunded under the rules when the system fails or a safety check blocks the request.
| Plan | Price and term | Credits | Main benefits |
|---|---|---|---|
| Free | ¥0 after registration | 500 credits on sign-up | 5 basic skills (Rendering Designer, Material-Lock Renderer, Colored Plan Generator, Concept Inspiration Designer, Cinematic Spatial Storyboard), single images, 1 concurrent image task, 10 project spaces |
| Pro Trial Pass | ¥39 for 7 days, first membership only | 3,000 credits | All skills, batches of 1–9, 3 concurrent image tasks, 30 project spaces |
| Pro Monthly Pass | ¥99 for 30 days | 8,000 membership credits | All skills, batches of 1–9, 3 concurrent image tasks, 30 project spaces |
| Pro Quarterly Pass | ¥249 for 90 days | 27,000 membership credits | All skills, batches of 1–9, 6 concurrent image tasks, 50 project spaces |
| Pro Annual Pass | ¥1288 for 365 days | 144,000 membership credits | All skills, batches of 1–9, 10 concurrent image tasks, unlimited project spaces |
| Team | 3–20 seats per year, ¥1098 per seat (3–4 seats), ¥998 (5–9 seats), ¥898 (10 seats or more) | 80,000 credits per seat in a shared team pool | Independent member accounts; the lead assigns seat credits and reviews usage; unlimited project spaces |
| Image model | 1K | 2K | 4K |
|---|---|---|---|
| Lab2.1 | 15 | 35 | 55 |
| Lab pro | 35 | 50 | 65 |
| Lab image 2.5 | 15 | 25 | 35 |
| Lab image 2.6 | 15 | 25 | 35 |
| Lab 5.5 | 35 | 45 | 65 |
| Lab 5.0pro | 45 | 55 | 80 |
Upscaling costs 15 credits each time. Chat mode analyses images and refines prompts without generating images: Ark Flash is free for everyone; Ark Pro (deeper thinking) costs free users 10 credits per message, and Pro and team members use it without limit. Video is charged by model and length, shown before you submit. Credit packs are also available: the ¥29 Quick Pack gives 2,900 credits, or choose any amount from ¥30 to ¥5,000 at 100 credits per ¥1, and purchased credits do not expire. Prices, benefits and available models are those shown on the purchase page and in your account.
11 / FAQ
Questions before you begin.
What is 溯源方舟 TechLab, and who is it for?
溯源方舟 TechLab (方舟TechLab) is an AI image platform for architecture and interior design at techlab.design. Architects, interior designers, and studios can start from text, floor plans, photos, or references to generate and refine renderings, colored plans, and specialist visuals for proposals and delivery.
How are 溯源方舟 TechLab, 方舟TechLab, techlab.design, and techlab.cool related?
溯源方舟 TechLab is the brand. 方舟TechLab is the AI image and visual creation product described here. The product website is https://techlab.design/, and the brand website is https://techlab.cool/. The operator is 重庆溯源方舟智能科技有限公司 This page explains the product at techlab.design; visit the brand website for broader business information.
Is 溯源方舟 TechLab suitable for home and interior design images?
Yes. Begin with a floor plan, site photo, white model, or existing scheme and use rendering, design-development, renovation, or furnishing tools to create and refine images. Once reviewed by the designer, renderings, colored plans, and proposal visuals can support client communication and delivery.
How do I use SU, 3DMAX, and CAD materials?
Export .skp, .max, .dwg, and similar source files as clear images in their original software, then upload them to the appropriate tool. SU/3DMAX screenshots provide spatial and material references; CAD screenshots provide plans and layouts. Site photos, floor plans, and style references also work.
Which tools suit textured screenshots and white models?
Use Rendering Designer or Material-Lock Renderer for textured SU/3DMAX screenshots to refine an established design's lighting and material presentation. Use Spatial Designer or Commercial Space Designer for white models, bare shells, and undesigned spaces. Describe use and furniture needs, then provide style through a reference or text.
Can I turn a floor plan into a colored plan?
Yes. Upload a floor plan or CAD screenshot, explain room uses, materials, and presentation style, and use a colored-plan assistant. Compare walls, doors, windows, and text with the original layout, then include the selected result in the proposal.
How can results follow the original structure and materials?
Use the original as the main reference. State the viewpoint, walls, doors, windows, furniture positions, and materials to preserve, then describe this round's changes. Compare results side by side and edit differences locally until the image reflects the design intention.
Can I change only a local material or light?
Yes. Begin with the original and a selected edit area, add the relevant material or lighting reference, and define the scope. Work through walls, furniture, or lighting one item at a time, checking edges, texture, and light transitions before continuing.
What base images can Base Image Cleaner produce?
Modes include SU Sketch, ID Channel, Clay Clean, and Lighting AO, emphasizing lines, regions, structure, and light and shade. The output is an image you can download or use in the Workspace as a reference for further generation.
What are Panorama and Video Workshop best for?
Panorama imports existing panoramas or generates them from renderings for spatial presentations viewers can look around. Video Workshop creates moving footage from text, first frames, or first and last frames. Review the design expression and pacing before using results in project presentations.
How do I organize multiple views and results for one project?
Align materials, lighting, subjects, and preservation requirements across views. Compare originals and results in the Workspace and verify furniture, openings, and spatial relationships. Save selected versions to Projects for continued editing. Quantities, resolution, and models depend on the account interface.
How do individual and team use differ?
Individuals organize their own images, canvases, projects, and prompts. Team members use independent accounts while the lead manages membership and shared credits. Materials and results are handed over under current permissions and team agreements; allowances and billing depend on the account interface.
How can AI output be used in proposals and delivery?
After designer review, renderings, colored plans, furnishing proposals, moodboards, panoramas, and videos can support presentations, client communication, and visual delivery. Detail and millwork images support design development. Confirm construction, procurement, or fabrication information against site dimensions, material methods, and professional review.
Does 方舟TechLab have a construction detail tool?
Yes. Construction Detail Designer turns a wall rendering or photo into a construction elevation image with material callouts, dimension chains and detail index marks by default, and draws a section detail when you ask for a section; interior walls and building facades are both supported. Millwork Designer draws a cabinet exterior next to its interior structure. Use results for design discussions, and verify implementation against site dimensions, material methods, and professional review.
Do I need to sign in, and how do I check costs and allowances?
This public guide requires no sign-in. Sign in or register to create. Check available models, credit notices, and account benefits when selecting tools and settings, then submit after confirming them. Team allowances are shown in the relevant management interface.
How much does 溯源方舟 TechLab cost, and is there a free allowance?
New accounts receive 500 credits, and free users can use 5 basic skills: Rendering Designer, Material-Lock Renderer, Colored Plan Generator, Concept Inspiration Designer and Cinematic Spatial Storyboard. Pro unlocks all skills and batch generation: the Trial Pass is ¥39 for 7 days with 3,000 credits for a first membership, the Monthly Pass ¥99 for 30 days with 8,000 membership credits, the Quarterly Pass ¥249 for 90 days with 27,000, and the Annual Pass ¥1288 for 365 days with 144,000.
What does Pro include, and how do I choose the Monthly, Quarterly or Annual Pass?
Pro includes all 30+ specialist skills and batches of 1–9 images, with more concurrent image tasks and project spaces by plan: Trial and Monthly Passes 3 tasks and 30 projects, Quarterly Pass 6 tasks and 50 projects, Annual Pass 10 tasks and unlimited projects. For a short trial choose the Trial or Monthly Pass; for regular work, the Quarterly or Annual Pass gives more membership credits and higher concurrency.
How many credits does an image use, and are failures charged?
Credits depend on the image model and resolution: Lab2.1 uses 15, 35 or 55 credits at 1K, 2K or 4K; Lab pro 35, 50 or 65; Lab image 2.5 and Lab image 2.6 15, 25 or 35; Lab 5.5 35, 45 or 65; Lab 5.0pro 45, 55 or 80. Upscaling costs 15 credits. Credits are refunded under the rules when the system fails or a safety check blocks the request, and the cost is shown before you submit.
Can I use the images commercially, and who owns the copyright?
Yes. Within the user agreement and the law, content generated on the platform may be used for personal study, design work, client communication and lawful commercial purposes, and the platform does not claim copyright in generated content; rights in the original content you upload remain with you or the original rights holder. When publishing or using images commercially, keep the AI-generated content labels the rules require.
Will my uploads and project files be used to train models?
No. Without your separate authorisation, the platform does not use your private project images, client materials or generated content for public showcases, advertising or model training; uploads are processed only as needed for generation, project storage, safety review and support, as described in the privacy policy.
What is the highest image resolution?
Image generation offers 1K, 2K and 4K, depending on the options each model supports; 2K is the recommended default for a balance of quality and speed, and 4K suits final presentations and client delivery. Selected images can also be upscaled afterwards.
Can AI plan floor layouts?
Yes. Floor Plan Planner starts from a CAD screenshot with a layout, an empty wall outline or a written area and room brief, and lays out a complete furnished floor plan with the requested numbers of bedrooms, living rooms and bathrooms for apartments, home renovations, villas, commercial spaces and building floors; structure, plumbing and fire escape still need professional confirmation.
How is the team plan priced for studios?
The team plan is billed per seat per year, with 3–20 seats available online: ¥1098 per seat for 3–4 seats, ¥998 for 5–9 seats and ¥898 for 10 seats or more. Each seat adds 80,000 credits to a shared team pool. Members use independent accounts, and the lead assigns seat credits and reviews usage.
Is there a structured tutorial?
Yes. The 方舟TechLab Academy offers illustrated and video lessons at techlab.design/academy.html after signing in: starter lessons cover the three modes, text-to-image and image-to-image and the first image, and skill lessons cover every specialist assistant with when to use it, which images to prepare, how to describe the request and common problems.
What does Xuanjing do, and what does it produce?
Xuanjing offers floor plan feng shui analysis and construction start-time selection. Upload a plan or describe its layout and provide the information required by the selected tradition to receive images, text, or illustrated reports. Date selection organizes candidate dates and times from the activity, date range, and conditions. Use it as traditional feng shui and calendar cultural reference; its inputs and outputs are separate from image creation tools.
NEXT / START CREATING
Start with a design idea and bring the result into your proposal.
Describe your idea and add image references when available. Choose the matching 方舟TechLab tool, generate and refine images, and organize the results into visuals that can be discussed and presented.
Start creating in 方舟TechLabWritten and reviewed by: 方舟TechLab Product Guide
First published: August 20, 2026 · Last reviewed: November 15, 2026
Operator: 重庆溯源方舟智能科技有限公司 Available capabilities and rules are those shown in the current interface and relevant agreements.