TECHLAB FIELD GUIDE
建筑 · 室内 · 视觉创作

溯源方舟 TechLab 建筑与室内 AI 出图工作台

溯源方舟 TechLab(TechLab.AI)是面向建筑师、室内设计师和设计工作室的 AI 出图与视觉创作平台,产品网站为 techlab.design。不必先完成完整三维建模,就能从文字需求、户型图、现场照片或参考图开始生成空间效果图;再在画布中继续修改,整理彩平、软装、节点表达、全景与视频等视觉成果,用于方案提案和交付。

TechLab 产品说明 ·
本页无需登录;实际创作需要登录或注册。

01 / 使用对象

TechLab 适合哪些设计师和团队?

从一句空间需求到一套提案画面,TechLab 把设计构思、AI 出图、图像修改与成果整理连接起来。已有户型图、现场照片或参考图可以直接作为创作起点;已有 SU/3DMAX 模型的项目,也可以继续使用截图完成视觉表达。

室内设计师
从家装、商业空间或旧改需求出发,生成效果图、彩平和软装提案。用参考图表达材料与氛围,再围绕选定结果逐步调整,衔接客户沟通与视觉交付。
建筑师
从场地资料、建筑草图、体量图或模型截图出发,组织外观、鸟瞰、轴测与节点表达。把体量、立面和材料意图转换为便于讨论、汇报和深化的图像成果。
设计工作室与项目团队
用场景化助手组织不同任务,用项目保存画布与候选方案,用提示词库复用有效描述。团队成员通过各自账号创作,负责人统一安排成员和团队算力。

02 / 平台模块

TechLab 有哪些工具,分别能做什么?

产品模块覆盖需求整理、底图准备、生成修改、成果展示、文化参考与账户支持。图像创作、全景视频、项目与词库各有具体用途;玄镜和账户功能单独说明,便于按功能名称、输入和输出识别产品能力。

01AI 协作台

按设计任务选择助手,让自然语言需求与图片进入有针对性的出图流程。效果图渲染、住宅方案、商业空间、软装、材料和节点表达各有相应入口,方便把“想做什么”转成具体操作。

输入与输出:提供任务说明及助手需要的图片、风格或材料参考,得到面向该任务的提示词与视觉结果。助手帮助组织需求,设计师决定方向;带材质截图选择渲染类,白模与毛坯选择方案填充类。

02工作区

在同一画布里组织原图、参考和生成结果,围绕选定图片继续修改。先确定整体空间方向,再调整墙面材料、光线、家具与局部细节,让不同轮次的方案有清楚的比较基准。

输入与输出:输入原始图片、已生成结果、局部选区和追加参考,输出下一轮图像与可保存的画布。通过并排比较、局部修改、结果复用和下载,把一张初稿推进为适合提案的视觉成果。

03底图净化器

把现有空间图片整理成便于下一轮创作的底图。SU 草图、ID 通道图、灰模净化图和光影 AO 等模式,分别侧重线条、区域划分、结构关系与明暗表达,便于重新组织设计参考。

输入与输出:输入空间图片,输出所选模式的处理图像。可以比较处理前后的画面,下载结果或带回工作区继续生成;根据下一步需要关注的结构、材质区域或光照关系选择模式。

04全景器

把空间方案从单张画面扩展到可环视的全景表达。既可导入已有全景图,也可从效果图开始 AI 全景生成,用于室内、建筑及景观方案的空间展示,让观看者理解不同方向的视觉关系。

输入与输出:输入已有全景图片或用于生成的效果图,得到可查看的全景内容。围绕房间开口、家具和视线组织展示,确认各方向的空间表达后,将全景用于方案沟通和视觉成果展示。

05视频工坊

把静态设计画面组织为动态影像。通过文字、首帧或首尾帧等创作方式描述镜头路线、重点区域与氛围变化,形成适合方案介绍、项目展示或概念短片的视频内容。

输入与输出:输入文字描述与所选模式需要的图片,输出生成视频。说明镜头怎样移动、主体需要怎样呈现,再查看成片与历史结果;确认画面节奏和设计表达后,整理到相应项目的展示材料中。

06项目

按项目保存和查找画布、图片及已有设计方向,让下一次修改可以从上一次结果继续。适合同一空间需要多轮推敲、同一项目包含多个视角,或需要整理不同提案版本的工作。

输入与输出:输入已保存的创作内容,得到可重新打开、查看和继续使用的项目集合。围绕项目名称、设计阶段和候选方向组织资料,配合原始参考与已确认成果,保持方案修改的上下文。

07提示词库

收藏、搜索和复用有效的设计描述,把常用的空间类型、材料语言、灯光要求与保留条件积累下来。下一次遇到相近任务时,可以从已有写法继续调整,而不是重新组织每个细节。

输入与输出:输入搜索条件或收藏的提示词,得到可查找、可复制和再编辑的文字参考。复用时替换本项目的空间、视角和材料条件,把已验证适合自己的描述方式带入新的创作任务。

08玄镜

玄镜提供户型风水分析与开工择时,按传统风水和历法体系整理空间资料与日期条件,输出文化参考。户型功能支持上传图纸或用文字描述格局;开工择时按事项、日期范围和相关条件整理候选日期及时间。

输入与输出:户型分析按所选体系补充朝向、年份或居住条件等信息,形成标注图像、文字或图文报告;择时输入事项与日期条件,形成候选日课和时辰说明。结果按传统文化参考归类,空间设计与工程资料继续按实际项目条件整理。

09账户与使用支持

账户功能用于登录与账号管理、查看会员和算力、进行充值及查阅相关订单。使用说明帮助了解工具操作,联系入口用于产品支持与课程、合作咨询;团队成员和算力管理方式见本页个人与团队章节。

输入与输出:输入本人账号下的设置、查询或购买操作,查看相应权益、记录与反馈。使用说明和联系入口提供后续帮助;费用、有效期、任务参数与当前可用模型,以操作界面提示为准。公开介绍仅说明产品功能,个人资料在对应账号权限内管理。

用 TechLab 出图,需要先完成建模吗?

不必先完成完整三维建模。只有文字想法时,可以使用灵感概念设计师或创作模式;已有户型图、现场照片、参考图或模型截图时,可以直接进入对应助手的图像工作流。若手中是 .skp、.max、.dwg 文件,请先在原软件中导出清晰图片,作为本页流程的输入;效果图、彩平与节点表达以图像形式输出。

先看输入状态,再选创作入口
手上的资料更匹配的起点先明确什么
已有材质的 SU/3DMAX 截图效果图渲染师、材质锁定渲染师哪些材料和构图要保留,哪些光影要调整
室内白模、毛坯或未完成空间空间设计师、商业空间设计师空间用途、风格方向、家具与材料设想
户型图、平面图图片或 CAD 截图室内或建筑彩平相关助手房间用途、材质区分与需要保留的布局
已有结果,只有局部需要变化工作区中的连续修改修改区域、追加参考与不可改变的内容

03 / 工具选择

手上的设计任务,适合用哪个 TechLab 工具?

TechLab 的 AI 协作台按设计任务组织工具:从住宅与商业空间方案,到软装搭配、物料板、灯光调整、建筑鸟瞰和节点表达,都有对应的创作入口。准备与任务相关的图片,再说明空间用途、风格方向和需要保留的条件,即可开始相应的 AI 出图流程。

本目录覆盖截至 2026 年 9 月 7 日已核对的 28 个场景化助手,采用工具入口中的正式名称。每项按输入资料、输出用途和使用条件说明;账户可用项与具体参数以当前界面为准,任务设置与模型选择在实际创作时确认。

TechLab 场景化助手目录:输入、输出与使用条件
工具输入资料输出用途使用条件
效果图渲染师已有室内效果图、已贴材质的 SU 截图或空间参考图。生成围绕原空间构图与材料方向的效果图,完善光照、质感和空间表现。已有空间构图和材质方向,按本轮光照与表现要求提供原图。
材质锁定渲染师已贴材质的 SU/3DMAX 模型截图及灯光目标。以保留材质系统为目标组织新的光照和画面表现,形成对应空间效果图。适合已贴材质的模型截图,明确材质保留项与灯光调整目标。
彩平图生成器户型图、CAD 平面截图或室内布局草图。生成室内彩色平面图像,用于展示房间用途、功能分区和材料关系。提供线条可辨的户型或平面图片,说明房间用途和材料分区。
空间设计师住宅空间图(含毛坯与白模),风格参考图可传可不传。结合住宅用途探索风格、陈设与生活氛围;有风格参考图时区分空间原图和参考图的职责,没有时按文字描述展开。补充居住用途;传了风格参考图就区分它与结构资料的角色,没传就把风格写成文字。
商业空间设计师商业结构图,门头立面或室内都可以,含白模与毛坯现场;经营用途说明;风格参考图可传可不传。按结构图是立面还是室内分别展开:门头出招牌、橱窗与入口,室内出材料、家具与陈列,保留条件需单独写明。说明经营类型并提供结构图;风格可以用参考图给,也可以直接写成文字。
精装旧改设计师已有室内或立面现状图,明确保留与改造范围。探索旧空间焕新方向,区分表面翻新、软装调整和更大范围的改造。有现状空间资料,先明确保留内容和改造范围。
建筑外观渲染师建筑效果图、体量模型截图或建筑外观照片。生成建筑外观效果图,组织立面材质、阳光与环境氛围。使用建筑外观视角图片,明确立面材质和光照方向。
建筑方案设计师建筑体量参考图,以及立面材料与风格参考。以体量条件为起点探索建筑外观方案,生成后核对开口与场地关系。结合体量条件与风格参考,说明本轮方案目标。
建筑规划鸟瞰设计师场地规划、航拍或模型图,配合建筑与景观风格参考。生成建筑群体、道路与景观的鸟瞰方案图像,组织场地关系与汇报视角。明确场地边界与布局条件,配合整体建筑和景观参考。
灵感概念设计师一个主题、一句话构想或更具体的文字需求。将文字扩展为视觉描述并衔接灵感图生成,用于从零开始的方向探索。适合从文字构想开始,说明主题、用途与期望氛围。
空间电影感分镜室内空间需求或空间图片,以及镜头表现目标。组织同一空间的多个机位,按当前数量选项输出对应张数的独立分镜图像。统一同一空间的主题与风格;最多 9 张,也可按需求输出拼版。
风格迁移师原始空间图与风格参考;提取风格时按入口说明准备图片。通过参考约束材质、色彩与氛围方向,生成风格迁移提示与视觉方案。提取风格或结合空间迁移时,按入口要求准备参考与目标图。
灯光设计师已完成设计的空间图,及时间、情绪或照明方向要求。以保留设计为目标调整光照,用于黄昏、夜景或不同灯光氛围的视觉推演。已有设计方向,明确时间、情绪或照明方式。
白模生成器空间效果图、建筑透视图或平面布局图。生成简洁的白模风格表现图像,帮助观察空间形体与方案关系。输入可辨识的空间或平面图片,输出用于白模风格的图像表达。
轴测图生成器平面布局图、室内效果图、手绘草图,或直接用文字描述拆解对象。生成完整或爆炸轴测图像:室内掀顶轴测、建筑外观轴测、楼层体量爆炸、构造层拆解、家具五金拆解。说明要呈现的对象与视角;需要拆解时说明层次要求。
物料板生成器空间效果图或材料风格参考图。整理主要材料、色彩与氛围关系,生成物料板,为选材讨论和方案提案提供图像表达。围绕已有空间或风格整理材料与配色,用于图像提案。
作品包装师一张已完成的作品图,或纯文字描述;可选风格名与标题文案。从三十六个具名风格里选定一个,把作品排成整页设计版面。可直接点名风格,完成后核对主体是否被文字遮挡。
项目海报设计师一到六张自己项目的效果图或实景照片,可附标题文案。把项目图组织成可直接发布的作品封面,多张图会一起排进同一张封面,用于小红书封面、作品集扉页或提案主视觉。不改动项目画面本身,只为其组织版式与文字层级。
电影海报设计师片名、剧情、题材关键词或人物关系。先判断影片类型与核心冲突,再从十种构成模型中择一,组织海报的视觉母题与字体系统。原创导向,不复刻既有海报;参考图仅用于提取抽象视觉方向。
东方编辑海报师文化主题、展览名称或几个关键词,可附参考图。把标题精炼到一至四字,配一件真实文化物证,组织成具编辑感的海报或出版封面。物证与标题互相改变;不使用假印章、伪小字或拼贴式古风装饰。
地域文化海报师省、市、古城或文化区名称,可附风格倾向。从地理、建筑、材料、历史、日常、当代与气质七个维度取材,以一个大字为骨架组织画面。遮住城市名与文案后,画面仍须留有可指认该地域的结构证据。
摄影模拟师相机气质加地点或题材,例如徕卡街头、哈苏湖面、理光日常。默认生成一张真实感照片;说「组图」时生成 3:4 竖版摄影拼图,内含二至四张同地点同调色的照片;也支持车窗视角。相机差异体现在镜头视角、构图习惯与人物距离,不靠颗粒或滤镜区分。
电影镜头设计师故事、人物关系或场景资料,可指定镜数。为每个镜头确定主要事件与观看立场,再决定机位、景别与遮挡,只出 1 张是九镜拼图,选几张就出几个独立镜头。管理叙事连续性、道具归属与机位轴线;画幅以工作区选择为准。
产品形态设计师产品简报、手绘草图,或一个已定形态的产品。先确定原型、姿态与比例,再把颜色、材质与表面工艺配成一套 CMF,输出产品概念渲染。说明成型工艺、分型线与拔模方向;单次输出一件产品,多方案由工作区批量数量控制。
产品场景渲染师产品图一张,可附场景与用途说明。在棚拍渐变、材质基座、使用现场或生活空间中择一,按材质安排布光、反射与落地阴影。仅改变光线、地面、背景与机位;产品轮廓、分件、控件与标识位置保持不变。
产品提案设计师产品图一张,可说明提案对象与沟通重点。从主图带细节、三段式、爆炸分件与 CMF 板四种版式中择一,组织主视觉、细节格与材料样。各格保持同一产品;文字仅保留标题与不超过四条短标签,其余信息以图面表达。
软装设计师空间图,及需要的风格、家具或配色参考。以保留硬装为目标组织家具、灯具、布艺等软装搭配,生成后核对硬装变化。以现有硬装为条件,说明软装方向或补充参考图片。
软装分析师已有室内效果图或实拍照片。整理家具、灯具、布艺等软装元素,生成便于说明搭配思路与空间氛围的分析图像。从已有软装空间图出发,整理图中元素的分析表达。
施工图深化设计师能看清吊顶、墙地面、柜体收口,或外墙、门窗、檐口等节点的参考图。从参考图展开节点大样图像,按参考图自动判断室内或建筑外立面,表达构造与材料层次。图中节点关系清晰,涉及实施时结合项目资料完成专业确认。
木作设计师柜体、收纳空间或木作家具图片。分析柜体功能分区与收纳关系,形成木作功能分析图,为家具和收纳方案讨论提供依据。明确柜体或收纳对象,结合实际尺寸开展后续方案确认。
景观方案设计师庭院、场地或景观图,以及风格和植物氛围参考。探索种植、铺装、水景与环境氛围,用于庭院或其他景观方案的视觉讨论。提供场地与风格资料,说明范围、尺度和景观目标。

通过这些 AI 工具,可以把节点、材料和功能意图转成图像,用于提案沟通与设计深化。涉及实施的节点资料,结合现场条件、准确尺寸和材料做法完成专业确认,再纳入项目交付流程。

04 / 相近工具

功能看起来相近的工具,应该怎么选?

按本轮目标选工具:渲染已有设计、填充新的空间方案、改造现状或整理软装分析,各自需要不同的输入与描述。下面三组选择可以帮助你找到更匹配的起点。

按任务边界区分三组工具
容易混淆的选择前者适合什么后者适合什么
效果图渲染师 / 材质锁定渲染师以已有效果图或带材质截图为参考,探索更具体的光照与材质表现。已有材质系统较明确,希望以保留材质为目标重新组织光照和画面表现。
空间设计师 / 精装旧改设计师白模、毛坯或尚未确定材料陈设的空间,需要从零补足设计意图,风格用参考图或文字给。已有现状空间需要改造,先说明哪些硬装、材料或家具要保留,哪些可以更新。
软装设计师 / 软装分析师希望提出家具、灯具、布艺等新的搭配方向,并尽量保留硬装条件。希望从已有空间图中整理家具、灯具、布艺等元素,生成软装分析与排版表达。

05 / 实际场景

有了原图,怎样选对 AI 出图方式?

同一张图片可以承担不同任务:呈现已确定的设计、探索新的材料与风格,或展开局部与多角度表达。把目标写具体,选择匹配的助手,就能让每一轮生成服务于下一步方案沟通。

01 / 带材质截图,继续提升表现

对于已有材质的 SU/3DMAX 截图,可从效果图渲染师或材质锁定渲染师开始。先调整原软件中的视角,让墙体、门窗和家具尽量清晰,避免工具栏、选中框遮挡关键位置;再说明哪些材质已确定,以及希望改善的照明、反射或画面氛围。

把已经确定的木地板、沙发位置和门窗关系写成保留条件,把希望调整的材料质感与光线单独列出。生成后与原图并排选择合适方向,再继续局部修改,形成用于方案展示的效果图。

02 / 白模与毛坯,先补足设计意图

室内白模、毛坯房和待设计空间可以直接作为方案填充的起点。住宅选空间设计师,商业选商业空间设计师,上传清晰的结构图片,补充空间用途、主要家具与墙体门窗保留要求。风格可以再传一张参考图来表达材料和氛围,也可以只用文字描述。

从材料、软装和灯光的组合中选择方向,再用追加参考和局部修改逐步完善。先完成用于讨论的方案画面,确定需要推进的设计后,继续整理成客户提案与视觉交付材料。

03 / 平面与户型,让布局更容易读懂

把户型图、平面图图片或 CAD 截图交给彩平相关助手,说明房间用途、地面材质与需要保留的布局。准备图片时检查线条是否清晰、图面是否歪斜,避免过多无关标注淹没空间信息。

彩平图把平面关系转成直观的材料与区域表达,便于向客户说明功能分区和空间方案。可结合房间用途与地面材质选择表现方式;涉及准确尺寸和标注的内容,以项目图纸与现场资料完成确认。

04 / 局部材质与光线,一次解决一个问题

当整体方案可以保留,只想更换一面墙或调整一处照明时,在工作区以原图和局部选区继续修改。明确参考图负责的内容:一张用于石材纹理,另一张用于灯光氛围,避免让参考图同时暗示互相冲突的布局。

围绕一处墙面、一组家具或一种照明逐项修改,方便判断每次调整带来的变化。对照原图检查边缘、纹理、反射与光影衔接,再把选定结果带入下一轮,逐步完善整套方案的表现。

05 / 建筑、鸟瞰与轴测,表达不同层次

从 AI 协作台选择建筑外观、鸟瞰或轴测相关助手,按助手说明准备建筑图、场地图、模型截图及必要的参考图。外观图重点描述立面材料与开窗,鸟瞰图补充场地边界、道路和景观关系,轴测图则应先明确希望读到的空间层次与视角。

外观、鸟瞰和轴测各自服务于不同层次的沟通:立面讲材料,鸟瞰讲场地,轴测讲功能和空间组织。将相应视角的结果与项目资料一起整理,可以更清楚地展示设计意图与深化方向。

06 / 多角度、全景与视频,组织沟通材料

需要解释同一方案时,可以分别处理不同视角,在工作区比较;需要环视氛围时使用全景器;需要动态片段时进入视频工坊。先确定要让观看者理解哪一段空间关系,再决定表达形式,不必把所有输出都堆到一次汇报里。

先统一项目的材料、灯光与主体要求,再比较各视角和镜头中的家具、开口及空间关系。全景与视频让方案以不同形式被观看;按已确认的设计方向筛选、调整,形成适合汇报与展示的视觉成果。

助手入口,一眼区分任务。

平台助手封面示例:对应不同设计任务,方便识别创作入口。
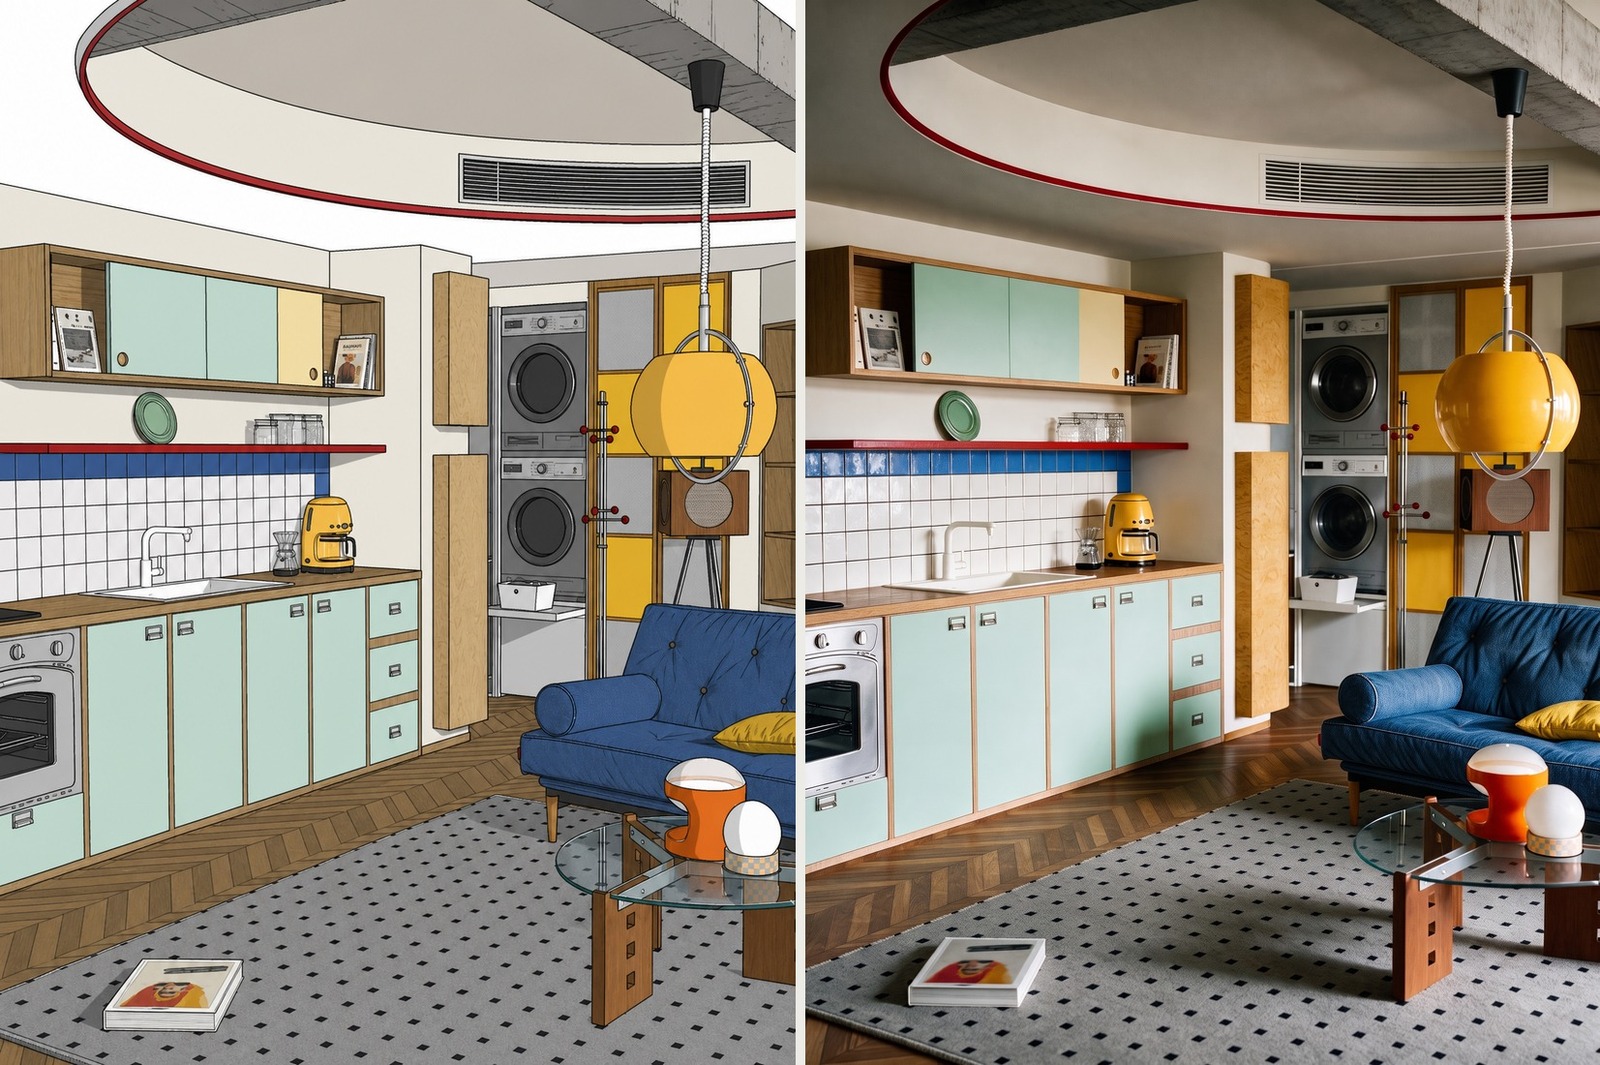
效果图渲染师的空间表现封面
助手示例 / 01效果图渲染师
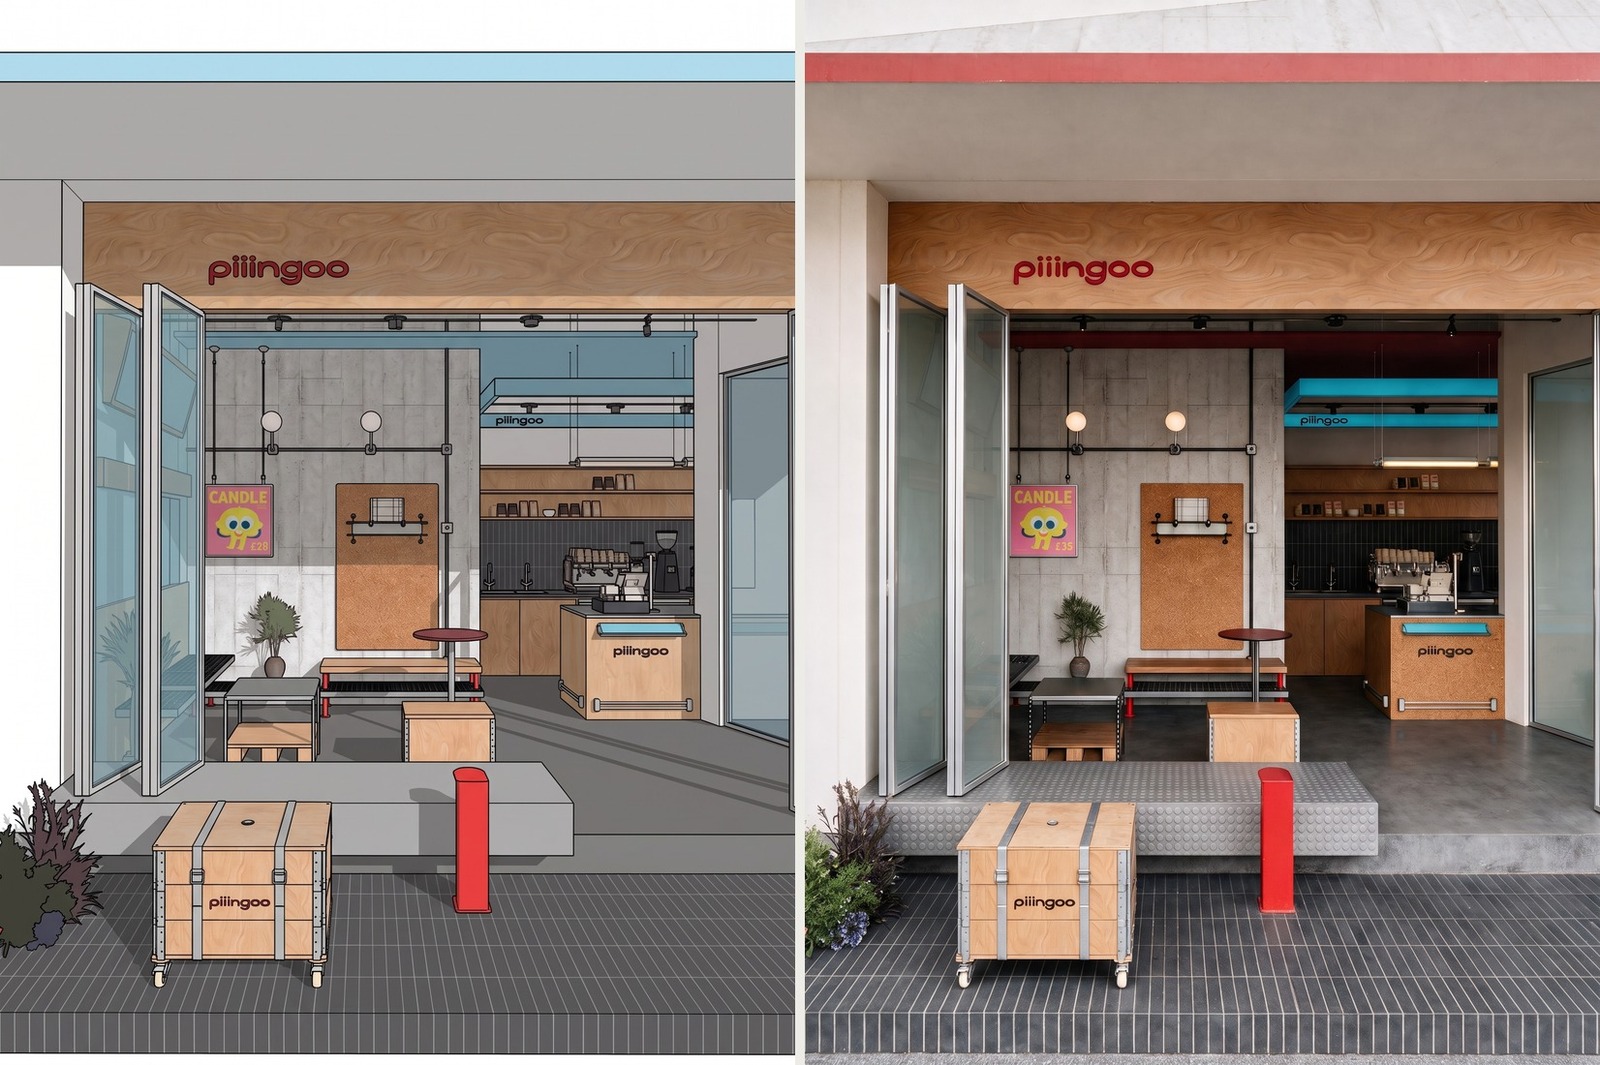
材质锁定渲染师的材质表现封面
助手示例 / 02材质锁定渲染师
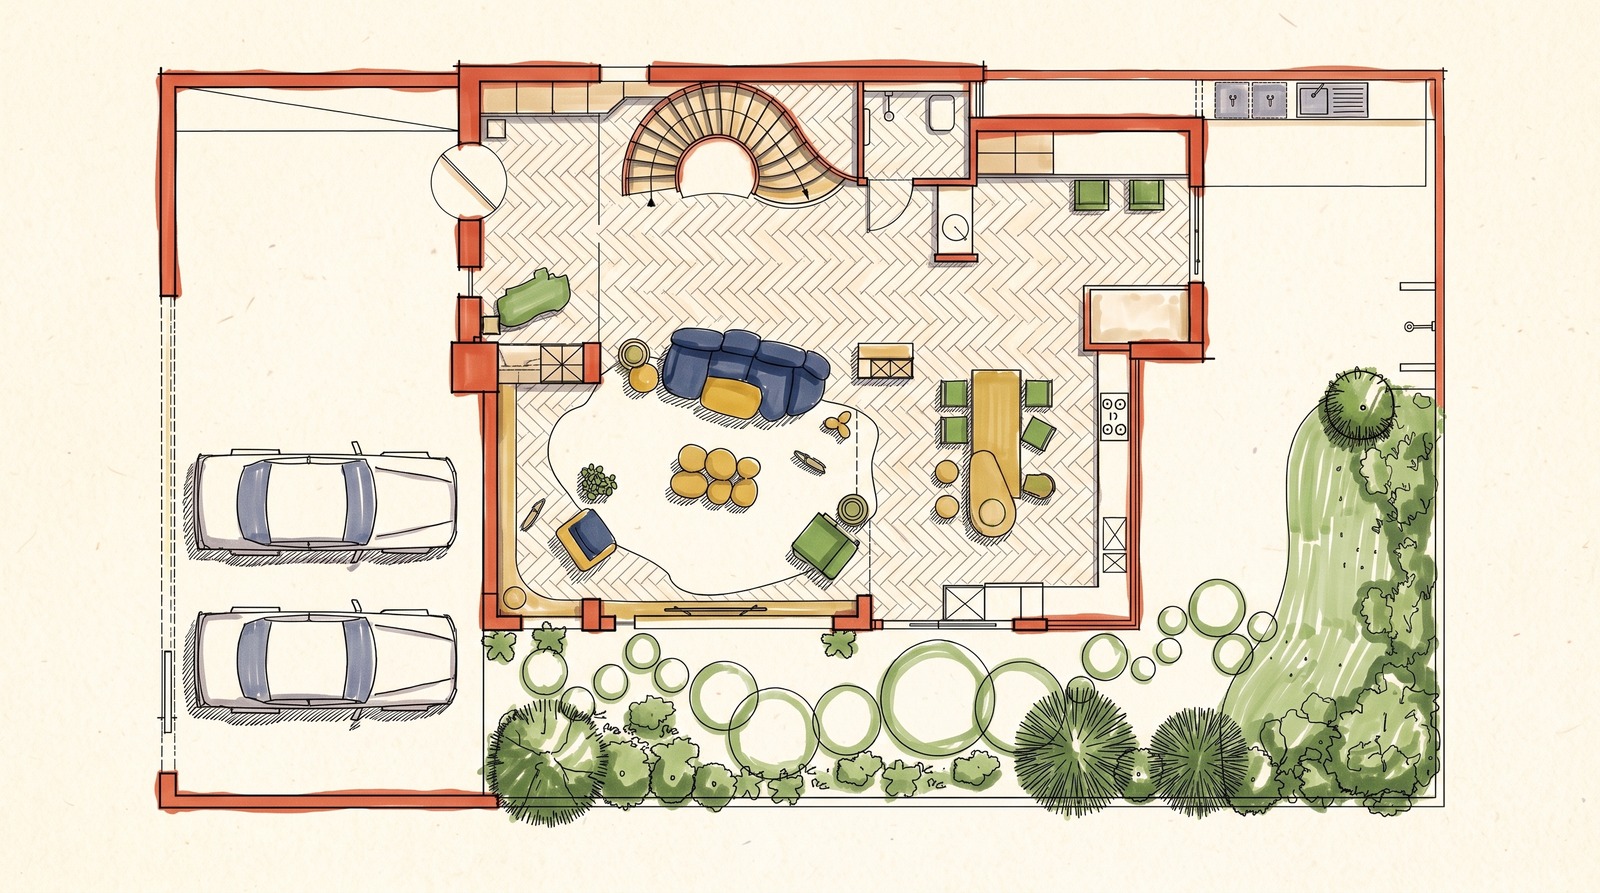
彩平图生成器的平面表达封面
助手示例 / 03彩平图生成器
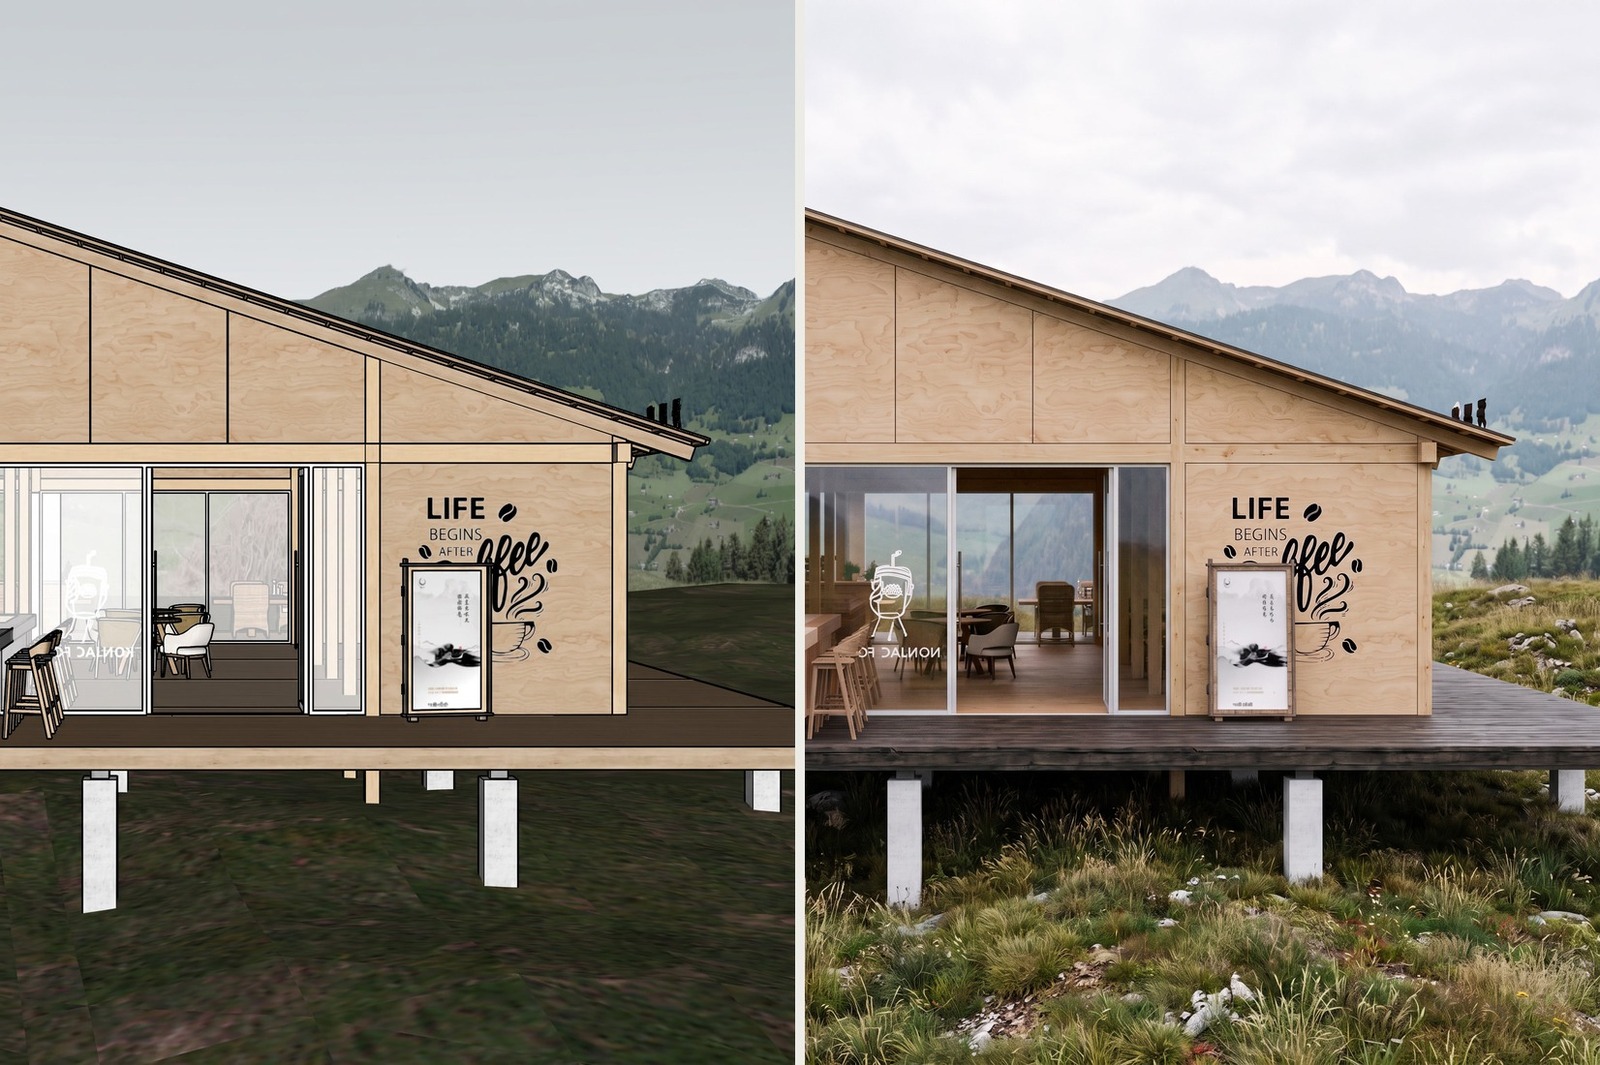
建筑外观渲染师的建筑表现封面
助手示例 / 04建筑外观渲染师

06 / 开始出图

第一次使用 TechLab,怎样开始出图?

  1. 先定义任务,再选择助手

    先写清本轮目标。只有文字想法时,可从灵感概念设计师或创作模式开始;已有图片时,按渲染、方案填充或局部修改选择入口,让输入与任务匹配。

  2. 准备原图与必要参考

    有图片资料时,上传清晰原图并加入相关参考。SU、3DMAX 或 CAD 项目可先导出图片或截图,照片与户型图也能作为起点;标明每张参考负责空间、材质还是氛围。

  3. 分开写“保留”与“修改”

    把构图、墙体、门窗和家具位置等已确定条件单独列出,再描述希望调整的材料、颜色与灯光。每轮围绕明确目标提出要求,方便生成后判断方向并继续推进。

  4. 确认参数与消耗,再提交

    根据用途选择当前可用模型、比例、分辨率和数量,确认算力提示后提交。探索方向时关注构图与风格,整理提案时再按展示或交付要求选择画面尺寸与表现细节。

  5. 并排比较,再做下一轮

    在工作区并排比较原图和候选结果,选定方向后继续调整材质、光影与细节。保存画布和提示词,下载确认后的图片,整理为效果图、提案图或下一轮全景与视频创作的素材。

07 / 个人与团队

个人与设计工作室怎样使用 TechLab?

个人:让下一轮修改找得到起点

个人使用时,在工作区完成生成与修改,在项目中整理画布和图片,在提示词库里积累有效描述。围绕一个项目保留原始资料、候选方向和已确认成果,让提案、调整与交付衔接起来。

已有方案可以重新打开继续创作,选定的图像也能作为下一轮参考。按项目阶段整理文件名称、版本和展示用途,方便回顾设计过程并把合适的成果交给客户或团队。

团队:成员与团队算力管理

TechLab 提供团队成员管理和算力共享池,适合工作室安排不同任务的使用。成员通过独立账号开展创作,负责人根据项目需要查看用量和安排额度;具体权限与使用权益以账号实际界面为准。

团队成员通过各自账号和项目组织创作,负责人管理成员与团队算力。素材和成果按当前权限及团队约定交接,便于明确任务分工、版本确认和交付责任。

09 / 常见问题

开始之前,你可能还想知道。

溯源方舟 TechLab 是什么,适合谁使用?

溯源方舟 TechLab(TechLab.AI)是运行在 techlab.design 的建筑与室内设计 AI 出图平台。建筑师、室内设计师和工作室可以从文字、户型图、照片或参考图直接开始,生成并修改效果图、彩平及专项表达,再整理提案与视觉交付成果。

溯源方舟、TechLab.AI、techlab.design 和 techlab.cool 是什么关系?

溯源方舟 TechLab 是品牌名称,TechLab.AI 是本页介绍的 AI 出图与视觉创作产品。产品网站是 https://techlab.design/,品牌官网是 https://techlab.cool/,运营主体为重庆溯源方舟智能科技有限公司。本页说明 techlab.design 的产品功能,品牌业务介绍请访问品牌官网。

溯源方舟 TechLab 适合家装和室内设计出图吗?

适合。家装和室内设计可以从户型图、现场照片、白模或已有方案图片开始,选择渲染、方案填充、旧改、软装等工具生成并完善画面。设计师确认后,可将效果图、彩平和提案图等视觉成果用于客户沟通与交付。

SU、3DMAX 和 CAD 资料怎样用于 AI 出图?

将 .skp、.max、.dwg 等源文件在原软件中导出为清晰图片,再上传到对应的 TechLab 工具。SU/3DMAX 截图用于空间与材质参考,CAD 截图用于平面与布局表达;现场照片、户型图和风格参考也可以作为创作资料。

带材质截图和白模分别适合什么工具?

已有材质的 SU/3DMAX 截图适合效果图渲染师或材质锁定渲染师,重点完善已有设计的光照与材质表现。白模、毛坯和待设计空间适合空间设计师或商业空间设计师,补充空间用途和家具需求后,风格可以再传一张参考图,也可以直接写成文字。

可以把户型图变成彩平图吗?

可以。上传户型图、平面图图片或 CAD 截图,说明房间用途、材质与表现风格,使用彩平相关助手生成彩色平面表达。完成后结合原始布局确认墙线、门窗和文字,将选定结果整理到方案提案中。

怎样让出图贴合原图结构和材质要求?

把原图作为主要参考,分别写明需要保留的视角、墙体、门窗、家具位置与材料条件,再说明本轮的调整目标。生成后并排对照原图,围绕差异继续局部修改,逐步确认符合设计意图的画面。

可以只改局部材质或灯光吗?

可以。以原图和局部选区开始,添加相应材料或灯光参考,并明确调整范围。围绕墙面、家具或照明逐项修改,再检查边缘、纹理与光影衔接,把选定结果继续用于下一轮创作。

底图净化器能生成哪些底图?

底图净化器提供 SU 草图、ID 通道图、灰模净化图和光影 AO 等图像处理模式,分别用于观察线条、区域、结构和明暗关系。输出为图片,可下载或带入工作区作为进一步出图的参考。

全景器和视频工坊分别适合什么成果?

全景器可导入已有全景图,或从效果图开始 AI 全景生成,用于可环视的空间展示。视频工坊支持文字、首帧和首尾帧等方式组织动态影像;确认设计表达与画面节奏后,可将结果用于方案介绍和项目展示。

怎样组织同一项目的多个角度和多张结果?

统一各视角的材料、灯光、主体与保留条件,在工作区并排比较原图和生成结果,逐项确认家具、门窗和空间关系。将选定版本保存到项目中继续修改;生成数量、分辨率和可用模型以账号实际界面为准。

个人使用和团队使用有什么不同?

个人可以围绕自己的图片、画布、项目和提示词组织创作。团队成员通过独立账号使用平台,负责人管理成员与算力共享池;素材和成果按照当前权限及团队约定交接,具体额度与计费以账号实际界面为准。

AI 出图成果怎样用于提案和交付?

效果图、彩平、软装提案、物料板、全景和视频等视觉成果,经设计师确认后可用于方案汇报、客户沟通与视觉交付。节点及木作表达可衔接深化讨论;涉及施工、采购或加工资料时,结合现场尺寸、材料做法和专业审核流程确认。

TechLab 有节点施工图生成工具吗?

有。施工图深化设计师可以从参考图展开节点大样与构造关系图像,室内收口与建筑外立面节点都支持,由参考图自动判断;木作设计师用于柜体和收纳功能分析。成果可用于深化讨论;涉及实施时,结合现场尺寸、材料做法与专业审核流程确认。

需要登录吗,费用与使用额度如何确认?

浏览本公开介绍页无需登录,登录或注册后即可进入实际创作流程。选择工具与生成参数时查看当前模型、算力提示和账号权益,确认设置后提交;团队使用额度可在相应管理界面中查看。

玄镜有哪些功能,输出什么内容?

玄镜提供户型风水分析和开工择时。可按入口上传户型图或描述格局,并补充所选体系要求的资料,得到图像、文字或图文报告;择时按事项、日期范围和相关条件整理候选日期与时辰。该模块按传统风水与历法文化参考使用,输入和输出与图像创作工具分别归类。

NEXT / 开始创作

从一个设计想法开始,把成果带进提案。

有想法就先描述,有图片就加入参考。选择匹配的 TechLab 工具,完成出图、修改与成果整理,让设计意图更快进入可讨论、可展示的画面。

进入 TechLab 开始创作

编写与核对:TechLab 产品说明
首次发布:2026 年 8 月 20 日 · 最近核对:2026 年 9 月 7 日
运营主体:重庆溯源方舟智能科技有限公司。产品可用能力与规则以实际界面及相关协议为准。

方舟TechLab FIELD GUIDE
Architecture · Interiors · Visual Creation

溯源方舟 TechLab Architecture and Interiors AI Image Workspace

溯源方舟 TechLab (方舟TechLab) is an AI image and visual creation platform for architects, interior designers, and design studios, available at techlab.design. Start with a written brief, floor plan, site photo, or reference image without first completing a full 3D model. Continue editing on the canvas and organize rendered plans, furnishing proposals, detail studies, panoramas, videos, and other visual work for presentations and delivery.

方舟TechLab product guide ·
This page is public. Sign in or register to create.

01 / WHO IT IS FOR

Which designers and teams is 方舟TechLab for?

From a short spatial brief to a set of presentation images, 方舟TechLab connects concept development, AI image generation, editing, and organization. Start directly with floor plans, site photos, or reference images. Projects with SU/3DMAX models can also use screenshots to develop their visual presentation.

Interior designers
Generate renderings, colored plans, and furnishing proposals for homes, commercial interiors, or renovations. Use references to express materials and atmosphere, then refine selected results for client communication and visual delivery.
Architects
Use site information, sketches, massing images, or model screenshots to develop exterior, aerial, axonometric, and detail views. Turn massing, facade, and material intentions into images for discussion, presentations, and further design development.
Design studios and project teams
Use specialist assistants for different tasks, projects to save canvases and options, and the prompt library to reuse effective descriptions. Members create through their own accounts while the team lead manages membership and team credits.

02 / PLATFORM MODULES

What tools does 方舟TechLab offer?

The platform covers brief development, base image preparation, generation and editing, presentation, cultural reference, and account support. Image creation, panoramas and video, projects, and the prompt library each serve a specific purpose. Xuanjing and account features are explained separately so you can identify each module by its name, inputs, and outputs.

01AI Collaboration

Choose an assistant for your design task to guide text and images through a focused generation workflow. Rendering, residential design, commercial spaces, furnishings, materials, and details have dedicated entries that turn your intent into a concrete next step.

Inputs and outputs:Provide a brief and the images, style references, or material references the assistant needs to produce task-specific prompts and visuals. The assistant organizes the brief; you choose the direction. Use rendering tools for textured screenshots and design-development tools for white models or unfinished spaces.

02Workspace

Organize original images, references, and generated results on one canvas, then continue editing a selected image. Establish the overall spatial direction before refining wall materials, lighting, furniture, and local details, with a clear basis for comparing each iteration.

Inputs and outputs:Use original images, generated results, selected edit areas, and additional references to produce the next image and a saveable canvas. Compare images side by side, edit locally, reuse results, and download selected work to develop a draft into presentation visuals.

03Base Image Cleaner

Prepare an existing spatial image for the next creative step. SU Sketch, ID Channel, Clay Clean, and Lighting AO modes emphasize linework, region separation, structure, or light and shade to help organize design references.

Inputs and outputs:Provide a spatial image to receive an image processed in the selected mode. Compare before and after, download it, or bring it into the Workspace. Choose a mode based on the structure, material regions, or lighting relationships needed next.

04Panorama

Expand a spatial proposal from a single view into a panorama that viewers can look around. Import an existing panorama or generate one from a rendering for interior, architectural, or landscape presentations, showing relationships in different directions.

Inputs and outputs:Provide an existing panorama or a rendering for generation to produce viewable panoramic content. Organize the presentation around openings, furniture, and sightlines, then review every direction before using it to explain or present the proposal.

05Video Workshop

Turn static design images into moving footage. Use text, a first frame, or first and last frames to describe camera movement, focal areas, and changes in atmosphere for proposal introductions, project showcases, or concept films.

Inputs and outputs:Provide text and any images required by the chosen mode to generate a video. Describe camera movement and subject presentation, then review the video and previous results. Once pacing and design expression are confirmed, add it to the project's presentation materials.

06Projects

Save and find canvases, images, and established design directions by project, so the next revision can continue from the last result. This suits repeated exploration of one space, multiple project views, or several proposal versions.

Inputs and outputs:Saved creative work becomes a collection of projects you can reopen, review, and continue. Organize materials by project name, design stage, and candidate direction, keeping original references and approved results together to preserve context.

07Prompt Library

Save, search, and reuse effective design descriptions for common space types, materials, lighting, and preservation constraints. Begin a similar task with an established description and adjust it to the new project.

Inputs and outputs:Search or save prompts to build a collection of text you can find, copy, and edit. Replace project-specific spaces, viewpoints, and materials while reusing wording that has worked well for you.

08Xuanjing

Xuanjing offers floor plan feng shui analysis and construction start-time selection. It organizes spatial information and date conditions using traditional feng shui and calendar systems as cultural reference. Upload a plan or describe its layout; for start-time selection, provide the activity, date range, and relevant conditions to obtain candidate dates and times.

Inputs and outputs:Depending on the selected tradition, floor plan analysis uses orientation, year, or residence information to produce annotated images, text, or illustrated reports. Date selection produces candidate dates and time explanations from the activity and conditions. Treat results as traditional cultural reference, and continue organizing design and engineering information according to the actual project.

09Account and Support

Account features cover sign-in and account management, membership and credits, top-ups, and related orders. Usage guides explain tool operation, while contact channels provide product support and course or partnership inquiries. See the individuals and teams section for member and credit management.

Inputs and outputs:Use your account to change settings, make inquiries or purchases, and review benefits, records, and feedback. Guides and contact channels provide further help. The active interface determines fees, validity, task settings, and available models. This public guide describes features; personal information is managed within the relevant account permissions.

Do I need to finish a 3D model before generating images?

No complete 3D model is required first. Start from text with Concept Inspiration Designer or Create mode, or use a floor plan, site photo, reference image, or model screenshot in the appropriate assistant workflow. Export .skp, .max, and .dwg source files as clear images in their original software before using them here. Renderings, colored plans, and detail studies are delivered as images.

Choose a starting point based on your input
Available materialRecommended starting pointClarify first
Textured SU/3DMAX screenshotsRendering Designer, Material-Lock RendererMaterials and composition to preserve; lighting to change
Interior white models, bare shells, or unfinished spacesSpatial Designer, Commercial Space DesignerUse, style direction, furniture, and material ideas
Floor plan images or CAD screenshotsInterior or architectural colored-plan assistantsRoom functions, material distinctions, and layout to retain
An existing result needing only local changesContinue editing in the WorkspaceEdit area, additional references, and elements to preserve

03 / CHOOSE A TOOL

Which 方舟TechLab tool fits your design task?

AI Collaboration organizes tools by task, from residential and commercial design to furnishing, moodboards, lighting, architectural aerial views, and details. Prepare relevant images and describe the use, style, and conditions to preserve to begin the corresponding image workflow.

This catalog covers 28 specialist assistants reviewed as of September 7, 2026, using their official entry names. Each lists inputs, output uses, and conditions. Availability and parameters depend on the current account interface; confirm task settings and model selection when creating.

方舟TechLab assistant catalog: inputs, outputs, and conditions
ToolInputsOutput usesConditions
Rendering DesignerAn interior rendering, textured SU screenshot, or spatial reference image.Create a rendering based on the original composition and material direction, refining lighting, texture, and spatial expression.Use an image with established composition and materials, and specify the lighting and presentation goals for this round.
Material-Lock RendererA textured SU/3DMAX screenshot and lighting goals.Develop new lighting and image presentation while aiming to retain the material system of the space.Use a textured model screenshot and specify materials to preserve and lighting changes to make.
Colored Plan GeneratorA floor plan, CAD plan screenshot, or interior layout sketch.Create a colored interior plan image showing room uses, functional zones, and material relationships.Provide a legible plan and explain room uses and material zones.
Spatial DesignerA residential space image, including bare shells and white models; a style reference is optional.Explore style, furnishings, and atmosphere for residential use. Distinguish the original space from any style reference, or develop the scheme from text alone.Describe the residential use. If you add a style reference, distinguish its role from the structural image; otherwise describe the style in words.
Commercial Space DesignerA commercial structure image, either a storefront facade or an interior, including white models and bare shells; the business use; an optional style reference.Develop signage, shop windows, and entrances for facades, or materials, furniture, and displays for interiors. State preservation requirements separately.Explain the business type and provide a structure image. Supply style through a reference or a written description.
Renovation DesignerAn existing interior or facade image with clear preservation and renovation boundaries.Explore how to refresh an existing space, distinguishing surface renewal, furnishing changes, and broader renovation.Provide current-condition images and define what stays and what may change.
Architectural Exterior RendererAn architectural rendering, massing screenshot, or exterior photograph.Generate exterior renderings that develop facade materials, sunlight, and environmental atmosphere.Use an exterior view and specify facade materials and lighting direction.
Architectural Concept DesignerAn architectural massing reference plus facade material and style references.Explore exterior concepts from the massing conditions, then check openings and site relationships in the result.Combine massing and style references and describe this round's design objective.
Architectural Aerial DesignerA site plan, aerial image, or model image with architectural and landscape style references.Generate aerial proposal images of buildings, roads, and landscape to communicate site relationships.Define site boundaries and layout conditions, with overall architectural and landscape references.
Concept Inspiration DesignerA theme, a short idea, or a more detailed written brief.Expand text into a visual description and an inspiration image for exploring a direction from scratch.Start from a written idea and describe the theme, purpose, and intended atmosphere.
Cinematic Spatial StoryboardAn interior brief or spatial image and the intended camera presentation.Organize multiple camera positions in the same space and produce the selected number of separate storyboard images.Keep the space's theme and style consistent; generate up to nine images, or a combined layout when requested.
Style Transfer DesignerAn original spatial image and style reference; prepare images as directed when extracting a style.Use references to guide materials, colors, and atmosphere, producing style-transfer prompts and visual proposals.Prepare reference and target images according to the selected extraction or transfer workflow.
Lighting DesignerAn image of an established design and requirements for time of day, mood, or lighting direction.Adjust lighting while aiming to preserve the design, exploring dusk, night, or other lighting atmospheres.Start with an established design direction and specify time, mood, or lighting method.
White Model GeneratorA spatial rendering, architectural perspective, or floor plan.Generate a simple white-model-style image for examining spatial forms and design relationships.Provide a legible spatial or plan image for a white-model-style visual output.
Axonometric GeneratorA plan, interior rendering, sketch, or written description of an object to break down.Generate complete or exploded axonometric images: roof-off interiors, exteriors, exploded floors, construction layers, or furniture hardware.Describe the object and viewpoint, and specify the layers needed for an exploded view.
Material Moodboard GeneratorA spatial rendering or material and style reference.Organize key materials, colors, and atmosphere into a moodboard for material discussions and proposals.Develop materials and colors around an existing space or style for a visual proposal.
Portfolio Layout DesignerOne completed project image or a text-only description, with an optional style name and title.Choose one of 36 named styles and compose the work as a full-page design layout.You may request a specific style. Check that typography does not cover the main subject.
Project Poster DesignerOne to six renderings or photographs of your project, with optional title text.Arrange project images into one publishable cover for Xiaohongshu, a portfolio opening, or a proposal's main visual.Organize layout and text hierarchy while preserving the project images themselves.
Film Poster DesignerA film title, plot, genre keywords, or character relationships.Identify the genre and central conflict, choose one of ten composition models, and develop the poster's visual motif and typography.Create an original poster rather than reproducing an existing one; references supply abstract visual direction only.
Oriental Editorial Poster DesignerA cultural theme, exhibition name, or keywords, with optional references.Refine the title to one to four Chinese characters and pair it with a real cultural artifact for an editorial poster or publication cover.Let the artifact and title shape one another; avoid fake seals, meaningless small text, and decorative historical collages.
Regional Culture Poster DesignerA province, city, historic town, or cultural region, with an optional style preference.Draw on geography, architecture, materials, history, everyday life, contemporary culture, and character, using a large Chinese character as the composition's structure.Even with the place name and copy hidden, the image should retain structural evidence identifying the region.
Photography SimulatorA camera character plus a place or subject, such as Leica street photography, a Hasselblad lake scene, or Ricoh everyday life.Generate one realistic photograph by default. Request a photo set for a 3:4 vertical composition containing two to four photographs of the same place with consistent grading. Vehicle-window viewpoints are also supported.Camera differences appear in viewpoint, composition habits, and distance from people, rather than grain or filters alone.
Cinematic Shot DesignerA story, character relationships, or scene information, with an optional shot count.Define each shot's main event and viewing position before choosing camera placement, framing, and occlusion. Selecting one image produces a nine-shot grid; selecting multiple images produces that many separate shots.Maintain narrative continuity, prop ownership, and camera axes. Use the aspect ratio selected in the Workspace.
Product Form DesignerA product brief, hand sketch, or product with an established form.Establish archetype, stance, and proportions, then combine color, material, and finish into a coherent CMF scheme for a concept rendering.Specify manufacturing process, parting lines, and draft direction. Each output contains one product; use Workspace batch quantity for multiple options.
Product Scene RendererOne product image, with optional scene and usage notes.Choose a studio gradient, material plinth, usage setting, or living space, then arrange lighting, reflections, and contact shadows for the materials.Change only lighting, ground, background, and camera position; retain the product's outline, parts, controls, and mark positions.
Product Proposal DesignerOne product image, with optional audience and communication priorities.Choose a hero image with details, a three-part layout, an exploded view, or a CMF board to organize the main visual, detail panels, and material samples.Keep the same product across all panels. Limit text to a title and up to four short labels, communicating the rest visually.
Soft Furnishing DesignerA spatial image and desired style, furniture, or color references.Develop furniture, lighting, and textile combinations while aiming to preserve the hard finishes. Check any hard-finish changes after generation.Use the existing hard finishes as constraints and describe the furnishing direction or add references.
Soft Furnishing AnalystAn existing interior rendering or photograph.Organize furniture, lighting, textiles, and related elements into an analysis image explaining the furnishing concept and atmosphere.Start with an image of a furnished space and analyze its visible elements.
Construction Detail DesignerA reference clearly showing ceiling, wall, floor, cabinetry, facade, window, door, or eaves details.Develop detail images from the reference, identifying interior or exterior conditions and expressing construction and material layers.Use clearly visible detail relationships. Confirm implementation professionally against project documentation.
Millwork DesignerAn image of cabinetry, storage, or wooden furniture.Analyze cabinet functions and storage relationships in a millwork function diagram for furniture and storage discussions.Identify the cabinet or storage subject and use real dimensions for subsequent design confirmation.
Landscape Concept DesignerA courtyard, site, or landscape image with style and planting-atmosphere references.Explore planting, paving, water features, and environmental atmosphere for landscape proposal discussions.Provide site and style information and describe the scope, scale, and landscape goals.

These AI tools turn detail, material, and functional intentions into images for proposal communication and design development. Before implementation, confirm details professionally against site conditions, accurate dimensions, and material methods, then include them in project delivery.

04 / SIMILAR TOOLS

How do I choose between similar tools?

Choose for this round's objective: rendering an established design, developing a new spatial scheme, renovating existing conditions, or analyzing furnishings. Each requires different input and instructions. These three comparisons help identify a suitable starting point.

Choose between three tool pairs by task scope
Tool pairUse the first forUse the second for
Rendering Designer / Material-Lock RendererExplore more specific lighting and material presentation from an existing rendering or textured screenshot.Rework lighting and presentation when the material system is already established and should be preserved.
Spatial Designer / Renovation DesignerDevelop design intentions for a white model, bare shell, or space with undecided materials and furnishings, using a style reference or text.Renovate an existing space, first specifying which hard finishes, materials, and furniture stay and which may change.
Soft Furnishing Designer / Soft Furnishing AnalystPropose new furniture, lighting, and textile combinations while preserving hard finishes as far as possible.Organize visible furniture, lighting, and textiles from an existing image into a furnishing analysis and presentation.

05 / PRACTICAL SCENARIOS

How do I choose the right image workflow?

The same image can communicate an established design, explore new materials and styles, or support local edits and additional views. Define the goal and select the matching assistant so each generation supports the next design discussion.

01 / Improve a textured screenshot

For textured SU/3DMAX screenshots, start with Rendering Designer or Material-Lock Renderer. Adjust the view in the original software so walls, doors, windows, and furniture are clear, without toolbars or selection boxes covering important areas. Explain which materials are established and which lighting, reflections, or atmosphere need improvement.

List the established wood flooring, sofa position, and door and window relationships as preservation requirements. List desired material and lighting changes separately. Compare results with the original, choose a direction, and continue local edits to develop a presentation rendering.

02 / Give a white model or bare shell a design direction

Interior white models, bare shells, and undesigned spaces can start a design-development task directly. Choose Spatial Designer for homes or Commercial Space Designer for businesses. Upload a clear structural image and describe use, main furniture, and walls and openings to preserve. Express style with an additional reference or text alone.

Choose a direction from the material, furnishing, and lighting combinations, then refine it with additional references and local edits. First create an image suitable for discussion, then develop the chosen direction into client presentation and delivery materials.

03 / Make a floor plan easier to read

Give a floor plan or CAD screenshot to a colored-plan assistant and describe room uses, floor materials, and the layout to retain. Check that lines are clear and the image is straight, and remove unrelated annotations that obscure the space.

Colored plans turn layout relationships into clear material and zone illustrations for client discussions. Choose the presentation according to room uses and flooring. Confirm precise dimensions and annotations against project drawings and site information.

04 / Change one material or lighting condition at a time

When the overall scheme can stay and only one wall or light needs changing, continue in the Workspace with the original image and a selected edit area. State each reference's role, such as stone texture or lighting atmosphere, to avoid conflicting layout cues.

Work through one wall, furniture group, or lighting condition at a time to see what each revision changes. Compare edges, texture, reflections, and lighting transitions with the original, then use the selected result for the next round.

05 / Explain architecture through exterior, aerial, and axonometric views

Choose an exterior, aerial, or axonometric assistant in AI Collaboration, then prepare architectural images, site information, model screenshots, and references as directed. Describe facade materials and openings for exteriors; boundaries, roads, and landscape for aerial views; and spatial layers and viewpoint for axonometrics.

Each view communicates a different level: facades explain materials, aerial views explain the site, and axonometrics explain functions and spatial organization. Combine the selected views with project information to communicate design intentions and development directions.

06 / Prepare multiple views, panoramas, and video

For explaining one scheme, process views separately and compare them in the Workspace. Use Panorama for an immersive view and Video Workshop for motion. First decide which spatial relationship the viewer should understand, then choose a format rather than including every output in one presentation.

Align materials, lighting, and subject requirements across the project, then compare furniture, openings, and spatial relationships across views and shots. Select and refine panoramas and videos against the agreed design direction to create suitable presentation visuals.

Recognize each assistant's task at a glance.

Assistant cover examples identify different design workflows.

Spatial rendering cover for Rendering Designer
Assistant example / 01Rendering Designer
Material rendering cover for Material-Lock Renderer
Assistant example / 02Material-Lock Renderer
Plan presentation cover for Colored Plan Generator
Assistant example / 03Colored Plan Generator
Architectural cover for Architectural Exterior Renderer
Assistant example / 04Architectural Exterior Renderer

06 / GET STARTED

How do I generate my first image in 方舟TechLab?

  1. Define the task, then choose an assistant

    Write down this round's goal. For text-only ideas, start with Concept Inspiration Designer or Create mode. For existing images, choose rendering, design development, or local editing so the input fits the task.

  2. Prepare the original and necessary references

    Upload a clear original and relevant references. Export images or screenshots from SU, 3DMAX, or CAD when needed; photos and floor plans also work. State whether each reference defines space, materials, or atmosphere.

  3. Separate what to preserve from what to change

    List established composition, walls, doors, windows, and furniture positions separately, then describe material, color, and lighting changes. Give each round a clear objective so the result is easier to assess and develop.

  4. Confirm settings and credit use before submitting

    Choose the currently available model, aspect ratio, resolution, and quantity for your purpose, then review the credit notice. Focus on composition and style while exploring; choose output dimensions and detail according to presentation or delivery requirements later.

  5. Compare side by side, then continue

    Compare the original and candidate results in the Workspace. After choosing a direction, refine materials, light, and details. Save the canvas and prompts, download approved images, and organize them as renderings, proposal images, or references for panoramas and video.

07 / INDIVIDUALS AND TEAMS

How can individuals and studios use 方舟TechLab?

Individuals: keep a starting point for the next revision

Generate and edit in the Workspace, organize canvases and images in Projects, and collect effective descriptions in the Prompt Library. Keep original materials, candidate directions, and approved results together for a connected proposal, revision, and delivery process.

Reopen an existing scheme to continue creating, or use a selected image as the next reference. Organize filenames, versions, and presentation uses by project stage so you can review the process and deliver suitable work to clients or colleagues.

Teams: manage members and shared credits

方舟TechLab offers member management and a shared credit pool for studio work. Members create with independent accounts; the lead reviews usage and allocates allowances according to project needs. Actual account permissions and benefits are shown in the interface.

Members organize work through their own accounts and projects while the lead manages members and team credits. Hand over materials and results according to current permissions and team agreements, with clear task ownership, version approval, and delivery responsibilities.

09 / FAQ

Questions before you begin.

What is 溯源方舟 TechLab, and who is it for?

溯源方舟 TechLab (方舟TechLab) is an AI image platform for architecture and interior design at techlab.design. Architects, interior designers, and studios can start from text, floor plans, photos, or references to generate and refine renderings, colored plans, and specialist visuals for proposals and delivery.

How are 溯源方舟 TechLab, 方舟TechLab, techlab.design, and techlab.cool related?

溯源方舟 TechLab is the brand. 方舟TechLab is the AI image and visual creation product described here. The product website is https://techlab.design/, and the brand website is https://techlab.cool/. The operator is 重庆溯源方舟智能科技有限公司 This page explains the product at techlab.design; visit the brand website for broader business information.

Is 溯源方舟 TechLab suitable for home and interior design images?

Yes. Begin with a floor plan, site photo, white model, or existing scheme and use rendering, design-development, renovation, or furnishing tools to create and refine images. Once reviewed by the designer, renderings, colored plans, and proposal visuals can support client communication and delivery.

How do I use SU, 3DMAX, and CAD materials?

Export .skp, .max, .dwg, and similar source files as clear images in their original software, then upload them to the appropriate tool. SU/3DMAX screenshots provide spatial and material references; CAD screenshots provide plans and layouts. Site photos, floor plans, and style references also work.

Which tools suit textured screenshots and white models?

Use Rendering Designer or Material-Lock Renderer for textured SU/3DMAX screenshots to refine an established design's lighting and material presentation. Use Spatial Designer or Commercial Space Designer for white models, bare shells, and undesigned spaces. Describe use and furniture needs, then provide style through a reference or text.

Can I turn a floor plan into a colored plan?

Yes. Upload a floor plan or CAD screenshot, explain room uses, materials, and presentation style, and use a colored-plan assistant. Compare walls, doors, windows, and text with the original layout, then include the selected result in the proposal.

How can results follow the original structure and materials?

Use the original as the main reference. State the viewpoint, walls, doors, windows, furniture positions, and materials to preserve, then describe this round's changes. Compare results side by side and edit differences locally until the image reflects the design intention.

Can I change only a local material or light?

Yes. Begin with the original and a selected edit area, add the relevant material or lighting reference, and define the scope. Work through walls, furniture, or lighting one item at a time, checking edges, texture, and light transitions before continuing.

What base images can Base Image Cleaner produce?

Modes include SU Sketch, ID Channel, Clay Clean, and Lighting AO, emphasizing lines, regions, structure, and light and shade. The output is an image you can download or use in the Workspace as a reference for further generation.

What are Panorama and Video Workshop best for?

Panorama imports existing panoramas or generates them from renderings for spatial presentations viewers can look around. Video Workshop creates moving footage from text, first frames, or first and last frames. Review the design expression and pacing before using results in project presentations.

How do I organize multiple views and results for one project?

Align materials, lighting, subjects, and preservation requirements across views. Compare originals and results in the Workspace and verify furniture, openings, and spatial relationships. Save selected versions to Projects for continued editing. Quantities, resolution, and models depend on the account interface.

How do individual and team use differ?

Individuals organize their own images, canvases, projects, and prompts. Team members use independent accounts while the lead manages membership and shared credits. Materials and results are handed over under current permissions and team agreements; allowances and billing depend on the account interface.

How can AI output be used in proposals and delivery?

After designer review, renderings, colored plans, furnishing proposals, moodboards, panoramas, and videos can support presentations, client communication, and visual delivery. Detail and millwork images support design development. Confirm construction, procurement, or fabrication information against site dimensions, material methods, and professional review.

Does 方舟TechLab have a construction detail tool?

Yes. Construction Detail Designer develops detail and construction relationship images from references, automatically identifying interior junctions or exterior details. Millwork Designer analyzes cabinetry and storage functions. Use results for design discussions, and verify implementation against site dimensions, material methods, and professional review.

Do I need to sign in, and how do I check costs and allowances?

This public guide requires no sign-in. Sign in or register to create. Check available models, credit notices, and account benefits when selecting tools and settings, then submit after confirming them. Team allowances are shown in the relevant management interface.

What does Xuanjing do, and what does it produce?

Xuanjing offers floor plan feng shui analysis and construction start-time selection. Upload a plan or describe its layout and provide the information required by the selected tradition to receive images, text, or illustrated reports. Date selection organizes candidate dates and times from the activity, date range, and conditions. Use it as traditional feng shui and calendar cultural reference; its inputs and outputs are separate from image creation tools.

NEXT / START CREATING

Start with a design idea and bring the result into your proposal.

Describe your idea and add image references when available. Choose the matching 方舟TechLab tool, generate and refine images, and organize the results into visuals that can be discussed and presented.

Start creating in 方舟TechLab

Written and reviewed by: 方舟TechLab Product Guide
First published: August 20, 2026 · Last reviewed: September 7, 2026
Operator: 重庆溯源方舟智能科技有限公司 Available capabilities and rules are those shown in the current interface and relevant agreements.